
Set up your ad inventory
How the supply side fits together — sites, zones, placements and ad tags — and the fastest path from an empty account to a serving ad slot.
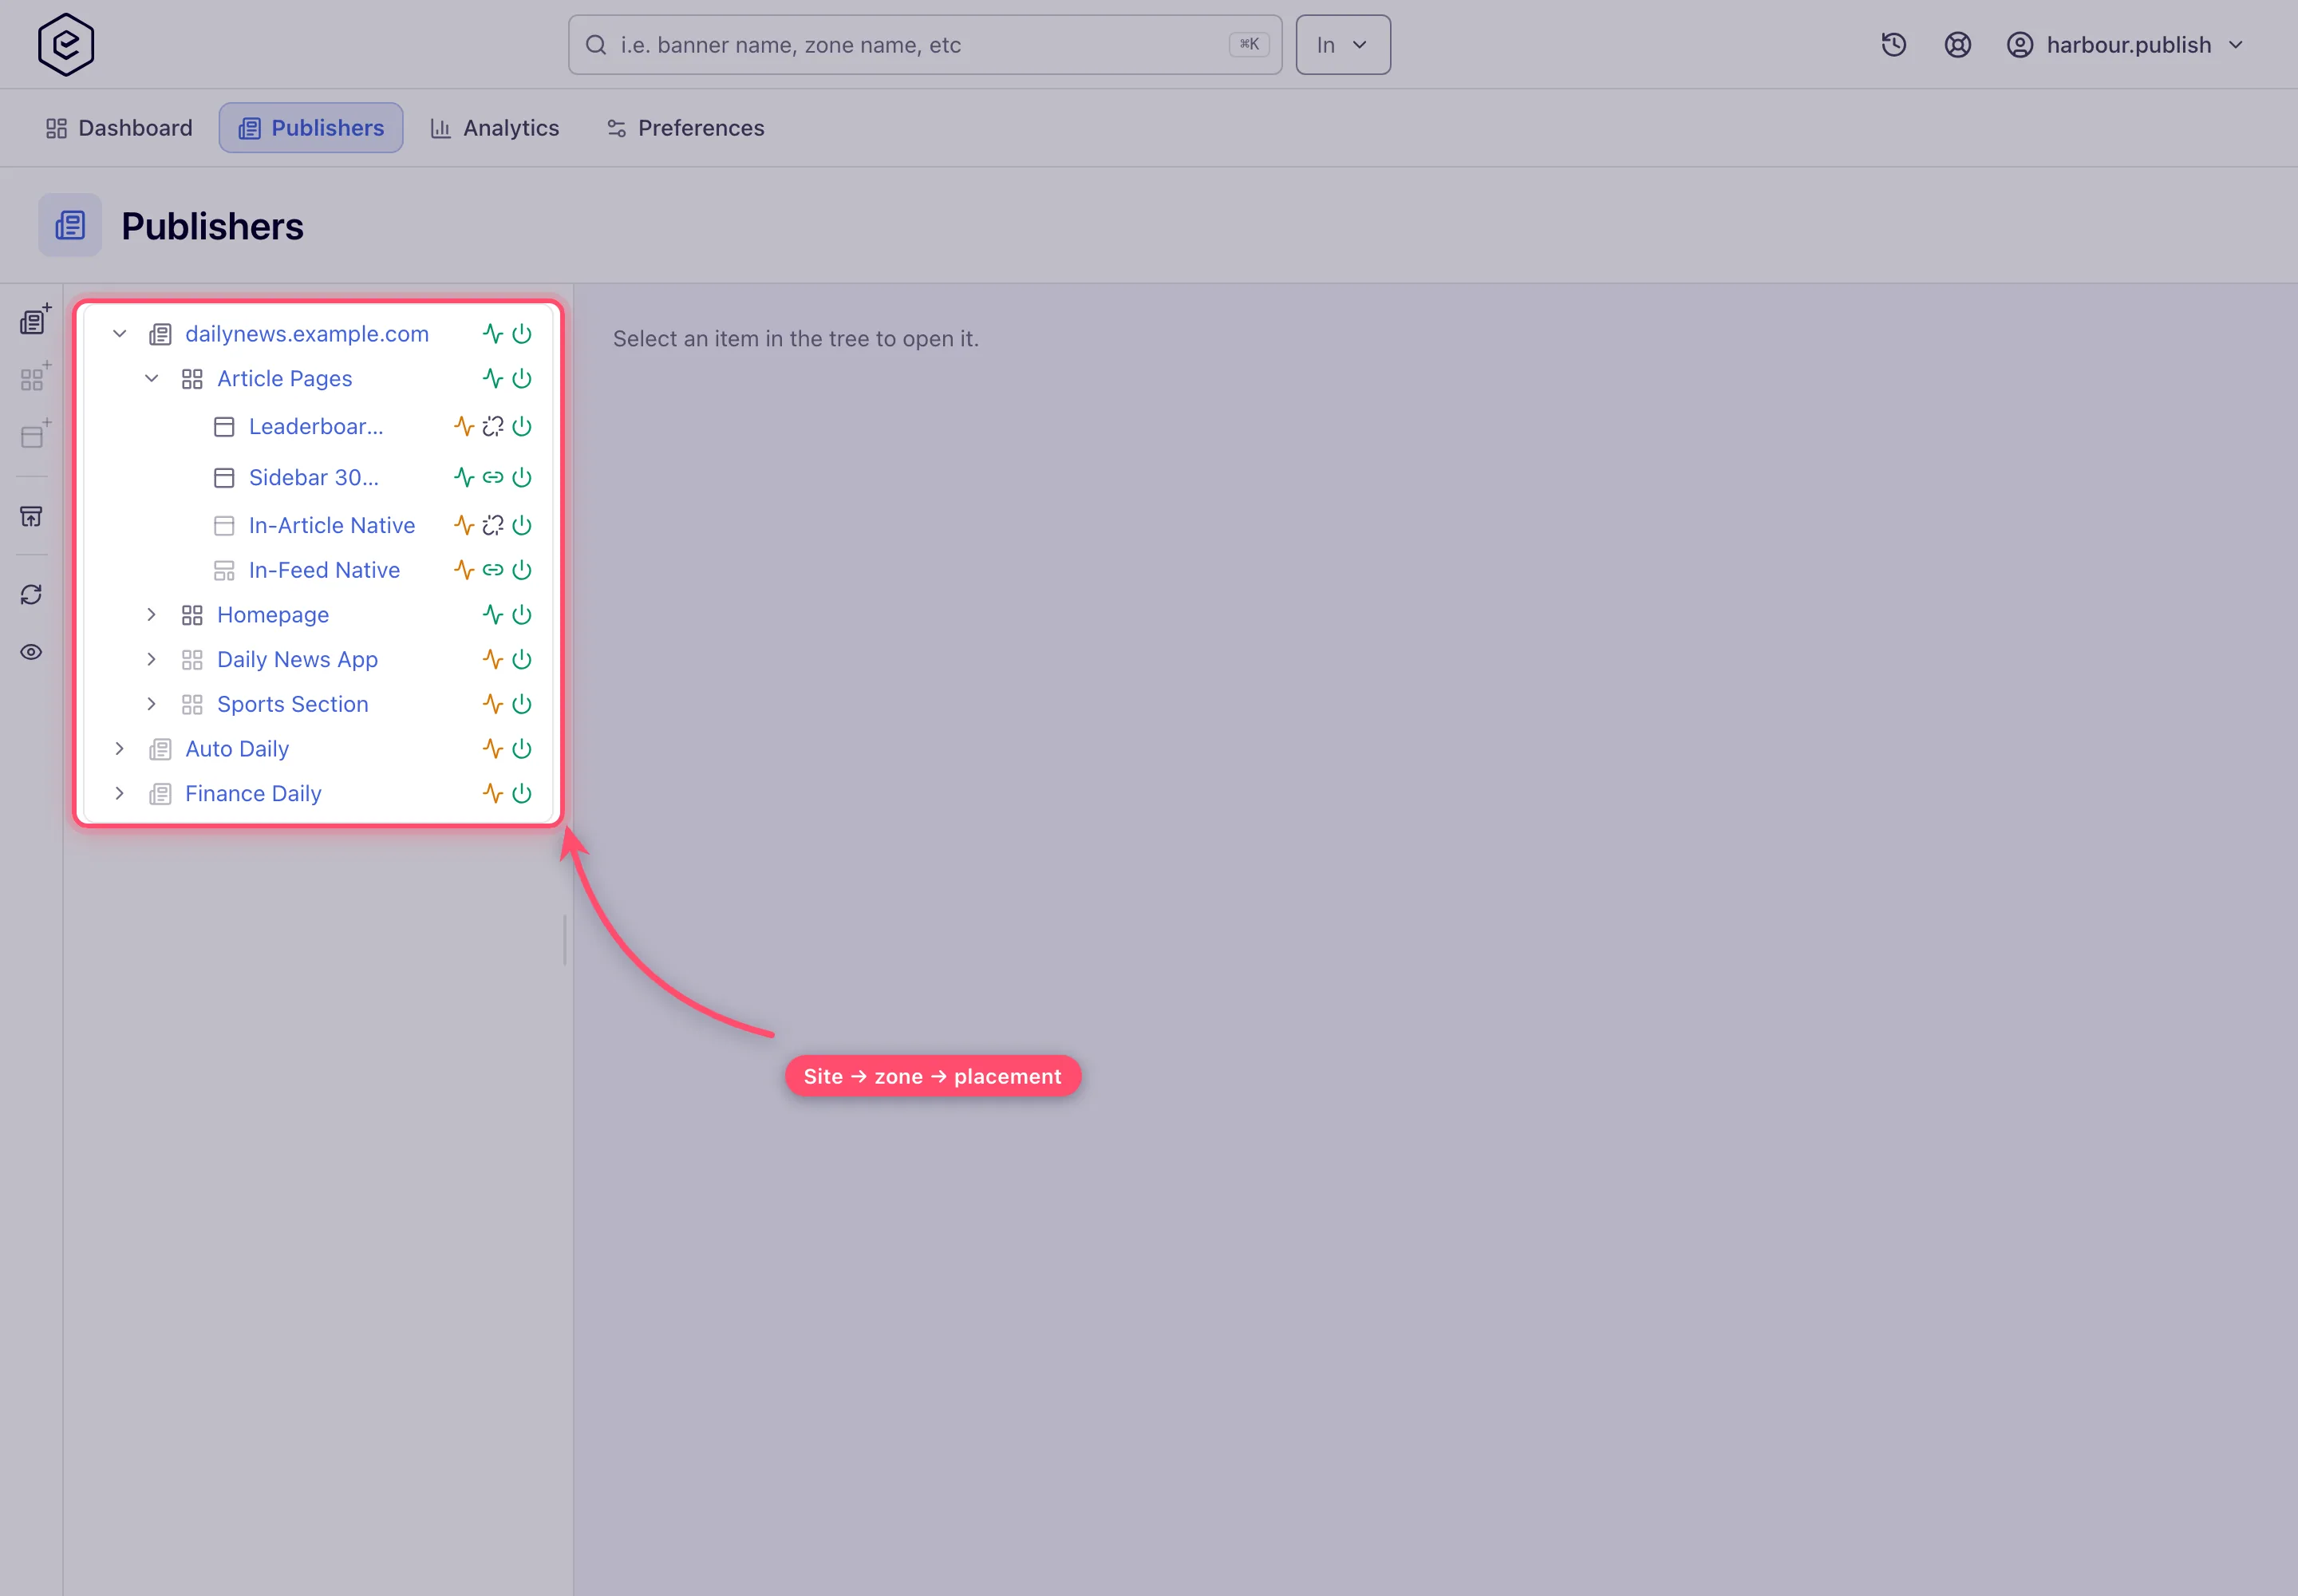
Everything you sell — a banner slot on a website, a video slot in a player, a native feed in an app — lives under the Publishers tab as a three-level tree: Site → Zone → Placement. This page explains what each level is for and walks the shortest path from an empty account to a placement that returns ads.
Who this is for
Network managers, publishers and admins who manage supply. A publisher builds and runs the tree; a network manager does the same and sets the money and traffic rules on top of it — see Per-role notes.
Prerequisites
- An account whose role holds the Inventory Create permission — the stock Publisher role does; the rights of a network-manager role are whatever your network administrator set in Roles.
- For serving real traffic later: at least one advertiser with a campaign and a banner on the demand side, linked to your placement directly or through Rules.
What each level does
| Level | What it represents | What you configure there |
|---|---|---|
| Site | One website or app property | Domain/bundle, categories, approval state, revenue share, pricing, limits, CPM threshold, RTB, payments, shares |
| Zone | A logical group of placements inside a site (e.g. “Homepage”, “Article pages”) | Name, pre-targeting, RTB, zone rules |
| Placement | The actual ad slot — the only level that produces an ad tag | Type (display / video / native / …), size where the type has one, ad tags, pricing, capping, linked banners, everything serving-related |
Ads never serve from a site or a zone directly; they serve from placements. The upper levels exist for organization, reporting and settings that cascade over many placements (pre-targeting set on a site filters traffic for every placement under it).
Steps: from empty account to a serving slot
- Go to Account → Publishers and click New site in the tree’s action rail. Fill in the name and URL (or app bundle) and save — see Create and edit a site.
- On the saved site, click Add new zone, name it and save — see Work with zones.
- On the zone, open Add new placement… and pick the placement type that matches the slot
you are selling — the type list and a decision table are in
Create a placement.
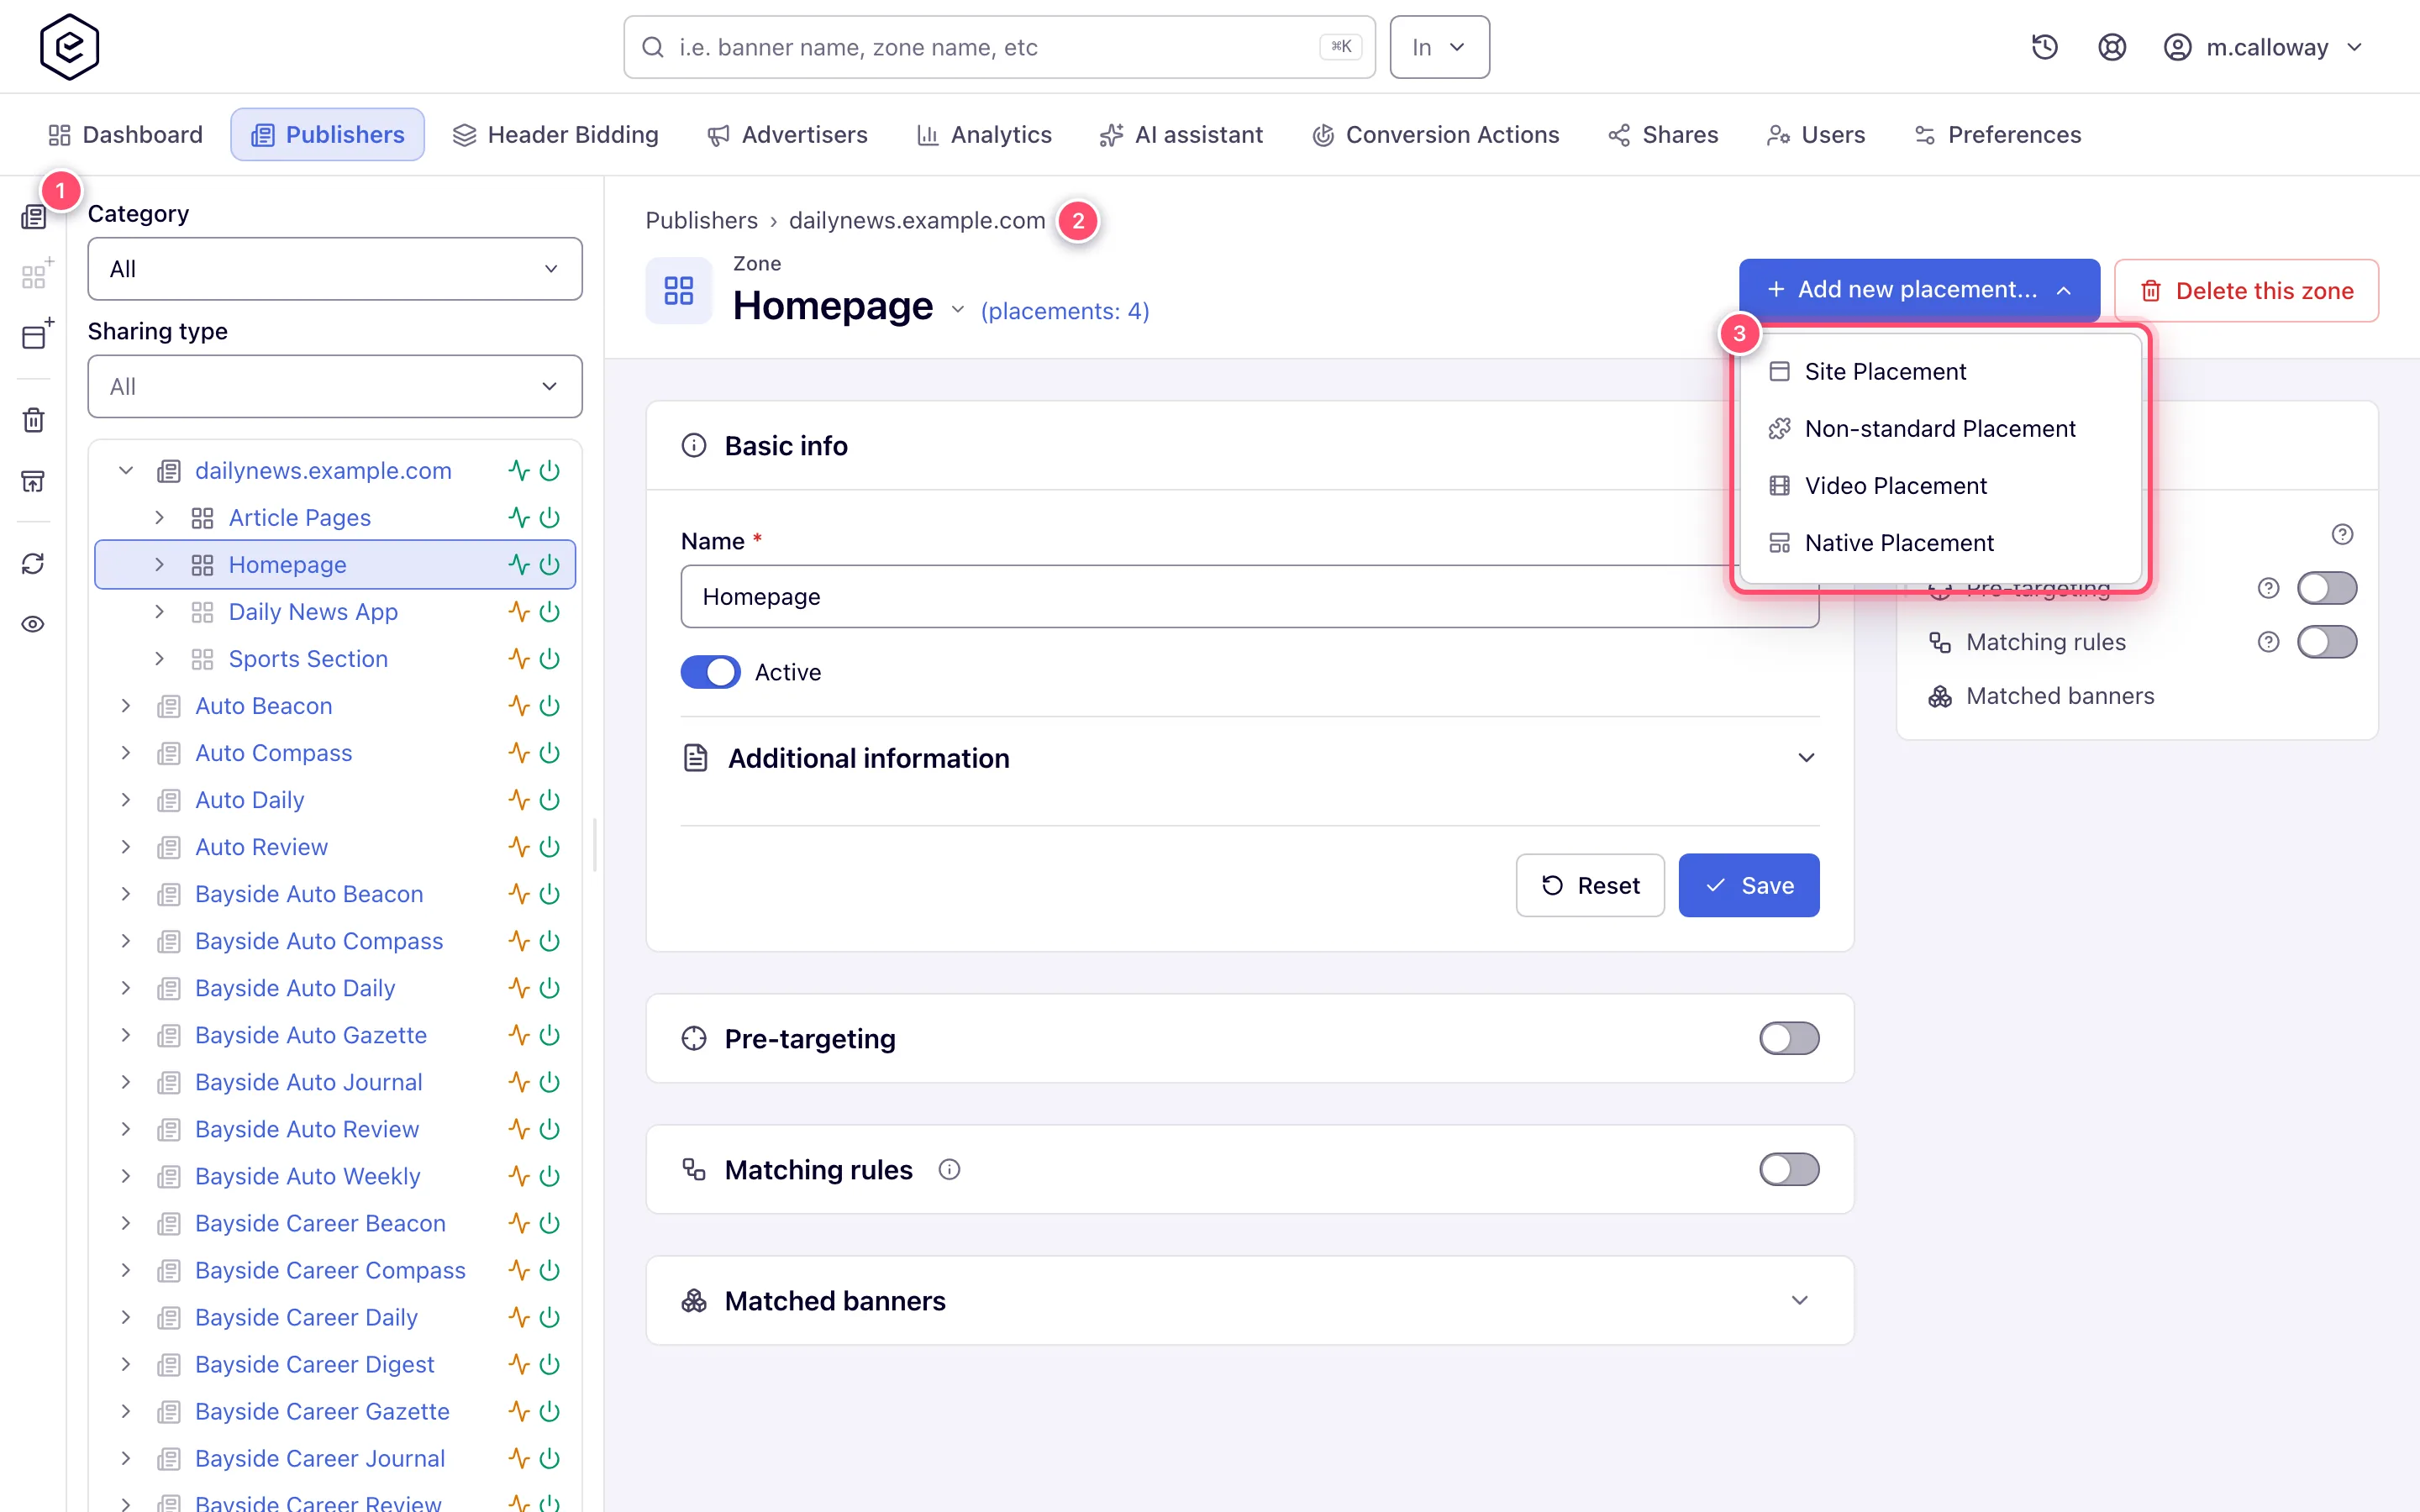
- Fill in the basic info and save. The page reloads as the full placement editor, and — on the types that have tags — gains the Ad tags & API card. Only Site and Email placements require a size; four of the eight types have no size field at all.
- Copy the tag from Ad tags & API (which tag tabs you see depends on your role) and put it on your page — see Ad tags, invocation codes and the API.
- Make sure demand can reach the placement: link banners on the Linked Banners card, or enable Matching Rules so eligible banners link automatically.
Note: the product nudges you along this chain. A site with zero zones and a zone with zero placements show a setup banner with a one-click “create” action; a placement with no linked banners and Rules off shows a serving-status warning in its header.
Corner cases and gotchas
Corner case: creating entities does not make ads appear. A placement serves only when at least one active, size-compatible banner is linked to it (directly or via Rules) and no targeting/capping/limit blocks the request. If the tag is on the page but nothing renders, start with Ads are not serving.
Corner case: the placement type is chosen at creation time and can never be changed. If you picked the wrong type, create a new placement and delete the old one.
Corner case: a placement switched off shows no tag. Turning Active off hides the Placement key and the whole Ad tags & API card straight away — before you save — because a paused placement serves nothing to install. Turn it back on to get them back.
Per-role notes
- Publisher — builds the whole tree and edits basic info, linked banners and sharing; the money and traffic-rule cards (pricing, revenue share, limits, RTB, matching rules) appear only if your network administrator grants them.
- Network manager — the same tree plus those cards: pre-targeting, OpenRTB, revenue share, pricing, limits and matching rules.
- Administrator — has no inventory tree; switch into a network user to work on sites, zones and placements.
- Can View share — every card is read-only; ask the owner for Can Edit.
Exact grants: see User roles.
Related
- Create and edit a site
- Work with zones
- Create a placement
- Display placements
- Pop-under, tab-under and direct-link placements
- Native placements
- Video placements
- Set a placement’s OpenRTB settings
- Application, email and click-through placements
- Ad tags, invocation codes and the API
- Rewrite served markup with Content replacement
- Header bidding on a publisher page
- Header bidding: what a publisher installs
- Email ad codes on a site
- Hierarchy and linking