
Schedule recurring report emails
Attach a schedule to a saved report so the server renders it and emails the file every week or month — the Scheduling dialog, days and hour in network time, file formats, slots that add and remove at once, and the recipient list that has nobody on it by default.
A saved report template can carry a schedule: on the days and at the hour you pick, in the network’s time zone, the server renders the template over its relative date range and emails the file to the recipients listed on it. Every change in the dialog applies at once — there is no Save button — and the owner is not a recipient unless added. Saving the template comes first: Save and reuse report templates; the overview is on Save, reuse and schedule reports.
Example. The Weekly sites template is scheduled for Monday 8:00 as XLSX with
finance@northwind.example and the manager’s own address as recipients. Every Monday at 08:00:30
network time the server renders the past seven days and emails the file to both addresses; she
never opens Analytics for it again.
Typical scenarios
| You want | Set | Where |
|---|---|---|
| A weekly XLSX to three colleagues every Monday morning | A slot Mon, Hour 8:00, File format XLSX; three addresses under Report recipients | Clock icon on the template → Scheduling |
| A month-end PDF on the 1st, plus a mid-month check on the 15th | Days of the month 1 and 15 in one Add (weekly days left empty), Hour 6:00, PDF | The same Scheduling dialog |
| A weekly summary and a monthly detailed file from one template | Two Adds: Mon 8:00 PDF, then day 1 at 7:00 XLSX — the days-and-hour pair is what makes a slot unique | The same dialog; both show on the Scheduled: line |
Step by step
Schedule recurring emails
-
In Saved reports, click the clock icon on the row. An amber clock means the template already has a schedule; a grey one means it has none — in the list that icon is the only thing telling the two apart.
-
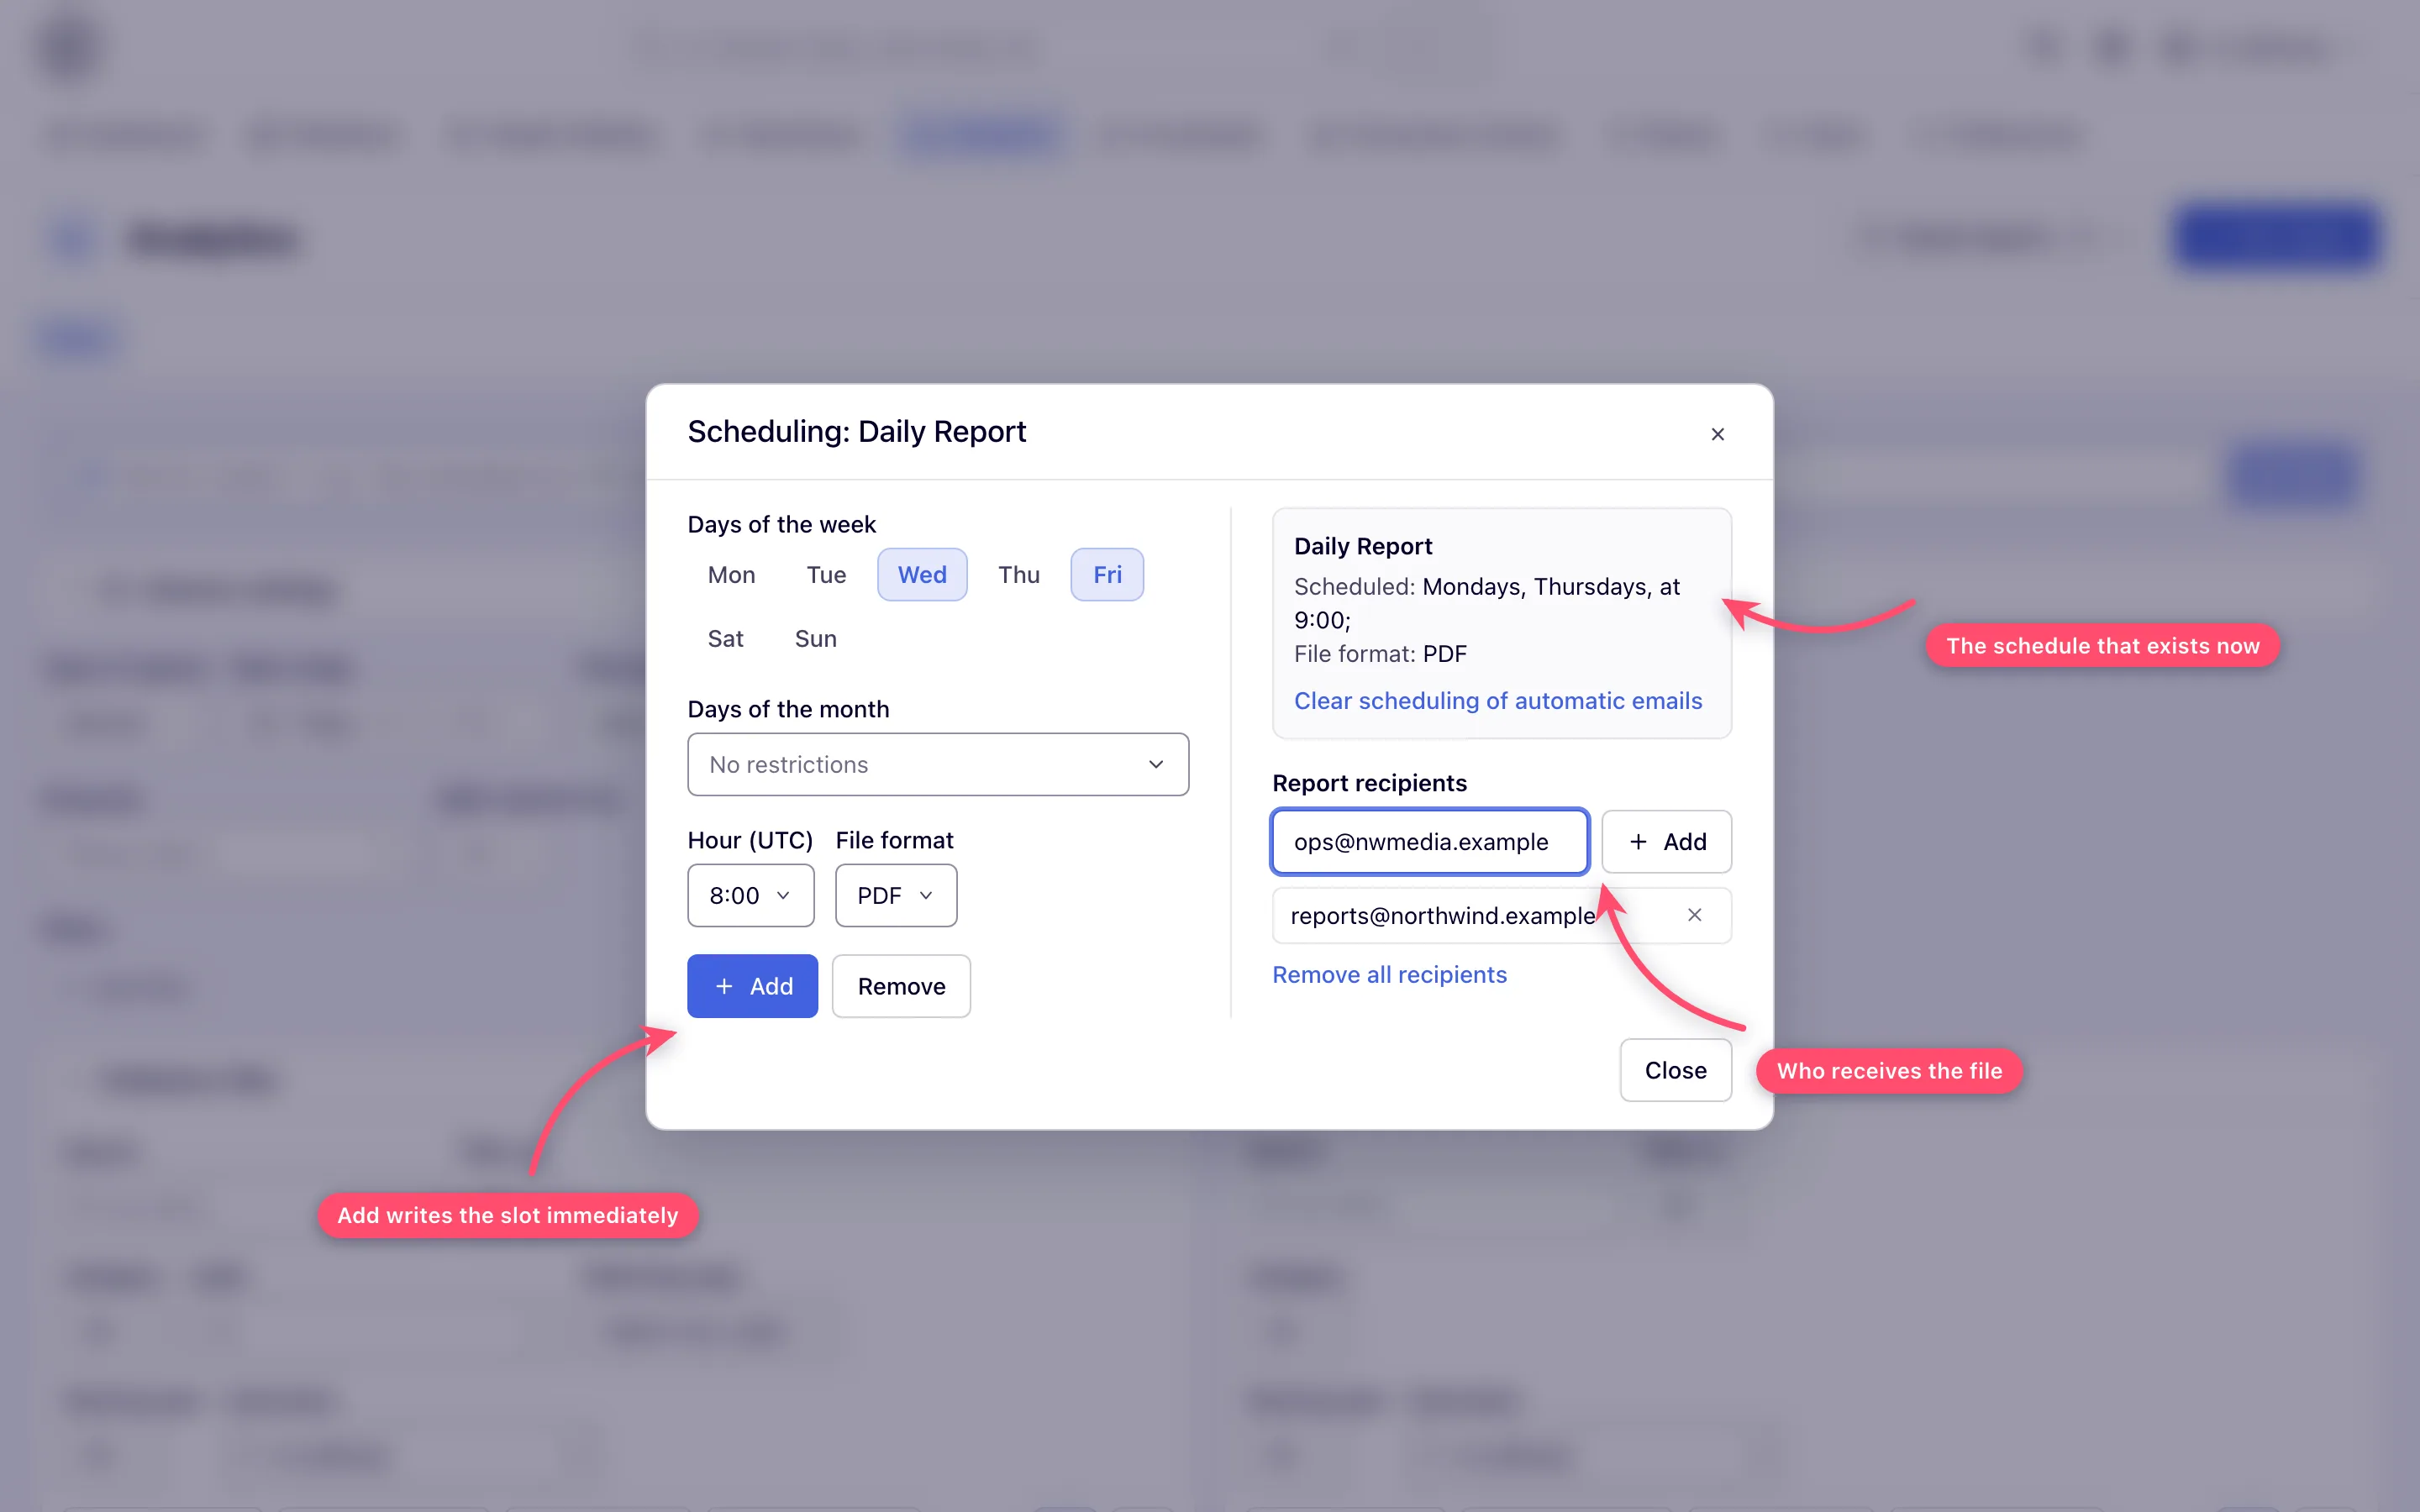
The Scheduling dialog opens. The left column always opens blank: it describes the slot you are about to add or remove, never the one that already exists. The right column is the current state — the Scheduled: line, the File format and the recipients.
-
Compose a slot: pick days of the week, and/or days of the month (left at No restrictions for a weekly-only schedule), an hour, and a file format. Add and Remove stay disabled until at least one day is picked.
-
Click Add. There is no Save button — the write happens at once, the day pickers reset, and the Scheduled: line on the right re-reads itself. That refreshed line is the confirmation. Repeat for as many slots as you need — a template can carry a weekly slot at one hour and a monthly slot at another.
-
To drop a slot, select the same days and hour and click Remove. Clear scheduling of automatic emails deletes every slot in one go; it is only shown while a schedule exists.
Recipients
- Under Report recipients, type an address and click Add (or press Enter). Added addresses appear as a list underneath, each with an ×; Remove all recipients clears the lot. Like the schedule, every change applies immediately.
- Add yourself if you want a copy: the list is the complete distribution list and the account that owns the template is not on it by default. A template that is scheduled but has no recipients renders on time and emails nobody, with nothing in the UI to say so.
Caveats and exceptions
- One slot per day-and-hour, whichever format you pick. Adding Monday 08:00 CSV to a template that already has Monday 08:00 XLSX is ignored. To change a slot’s format, Remove it and add it again. Remove matches on days + hour only: the File format selector is ignored when removing.
- Weekly and monthly days in one Add create both sets of slots. Mon plus day 1 means “every Monday and the 1st of every month”, not “the 1st only when it is a Monday”. The two pickers are a union, never an intersection.
- The hour and the day are the network’s time zone — UTC unless your network has been set to another zone; the dialog labels the field with it, e.g. Hour (UTC). Convert from your own zone: on a UTC network a slot for Monday 23:00 arrives in Kyiv (UTC+2/+3) in the small hours of Tuesday. The sender runs 30 seconds past each hour. On the night the clocks fall back the repeated hour sends its reports once; on the night they spring forward the skipped hour’s reports go out with the next hour.
- Outbound mail must be configured by Epom for your network, and the Scheduled Analytics Report email template must be active — see Notifications & outbound mail.
- The emailed file is cut at the row limit for its format, exactly as an interactive export is, and only the PDF and HTML attachments say so — they carry The report is too big and was trimmed, please log in to your account for full report. in the header. A CSV, XLSX or JSON attachment just arrives short, and the covering email never mentions it. If a scheduled file looks truncated, check the per-format export limits with Epom support or your account manager and pick a format with more headroom — see Exports. The caveats that apply to templates and schedules alike — who can use it, a recipient address is checked only for its shape, the address bar — are on Save, reuse and schedule reports.
Not working?
| Symptom | Check | Where |
|---|---|---|
| The scheduled email never arrives | The template has at least one recipient — the owner is not a recipient by default | Clock icon → Report recipients |
| The slot exists for that day and hour in network time, not yours | Scheduled: line in the dialog; the time zone in the Hour (…) label | |
| The owning user and its parent account are active; the Scheduled Analytics Report email template is active; outbound mail works | Network administrator: Users; Notifications & outbound mail. If all hold, ask Epom support or your account manager to re-send the missed slot | |
| An Advanced report whose Placement Label, Banner Label or Banner Template filter covers more placements or banners than the network allows (20,000 by default) is not sent, silently; the server log records a warning naming the report | Run the template once from Analytics: if it is refused with Narrow the report …, narrow it and Update the template | |
| The email arrived but the file is short | The format’s row limit cut it; only PDF and HTML say so in the header | Pick a format with more headroom — Exports |
| Add stays greyed in the Scheduling dialog | No day is picked yet — at least one weekday or day of the month is required | Left column of the dialog |
| My new slot did not appear on the Scheduled: line | A slot with the same days and hour already exists (format does not make it different) | Remove the old one, then Add the new format |
| Remove did nothing | The days or hour differ from the existing slot; the format you selected is irrelevant | Match the Scheduled: line exactly, or use Clear scheduling of automatic emails |
Recipient addresses — a typo that looks like an address, … is already a recipient, Invalid email — are on Save, reuse and schedule reports; the template itself is on Save and reuse report templates.
Reference
Every field of the Scheduling dialog is in the hub’s Reference; the schedule and recipient REST calls are in Over the API.
