
Copy the pixel or the landing-page snippet
Copy the JS pixel, the image pixel URL or the landing-page snippet from the Conversion tracking code window and place it on the advertiser's pages — step by step, with what each block is for, the cookie and window caveats, and a fix-it checklist.
What it is and why
Two of the three tracking codes report a conversion from the visitor’s browser. The pixel is a script or image URL you place on the page a user reaches after converting; it is matched on the cookie your ad-serving domain wrote when the ad was served. The snippet is a block the advertiser installs on every page of their site; it stores the click id from the landing URL in the site’s own first-party storage, so it keeps counting where the pixel’s cookie is blocked. This page covers copying both from the window you opened in Open the tracking window and pick the ad-serving domain; conversions reported by a partner’s backend are on Set up a server-to-server postback.
Example. The purchase action is linked to the campaign “Spring Prospecting CPC”. The
advertiser’s web developer gets the JS pixel tracking block for the order-confirmation page,
and their email tool — which only takes an image URL — gets the Pixel tracking URL with the
t=(timestamp) replaced by the tool’s own cache-buster. For the Safari share of the traffic the
same developer installs the Snippet block on every page of the site.
Typical scenarios
| You want | Copy | Where |
|---|---|---|
| Count purchases on an ordinary web thank-you page | JS pixel tracking | Pixel Tracking tab |
| A pixel for an email template or a page builder that only takes an image URL | Pixel tracking URL — and replace t=(timestamp) yourself | Pixel Tracking tab |
| Conversions from visitors whose browser blocks your cookie (Safari, private windows) | the Snippet block, installed on every page of the advertiser’s site | Snippet tab → Install the landing-page helper |
Step by step
The window and the Ad-serving domain are set up in Open the tracking window and pick the ad-serving domain.
Pixel tracking (browser-side)
-
Open the Pixel Tracking tab.
-
Copy one of the code blocks and place it on the page a user reaches after converting. They appear in this order:
Block What it is When to use JS pixel tracking Script that requests a 1×1 tracking image from /action.gifStandard choice for web pages JS pixel tracking with piggybacks Script that loads /action.jsfrom the ad server, which can return client-side piggyback markupLegacy. Only for a page that already carries it — the Snippet renders client-side (JS) piggybacks on its own Pixel tracking URL The bare /action.gifURLFor systems that only accept an image URL (email templates, third-party builders) The “with piggybacks” block appears only when the campaign’s Piggybacks card is switched on and your role holds the Piggyback Pixel Tracking permission.
-
For the Pixel tracking URL, replace the
t=(timestamp)at its end yourself with something that changes on every call. It is deliberately not written as a$$…$$macro, because nothing on the ad server expands it — this URL is fired by whatever system you paste it into. The two script blocks set it themselves fromnew Date().getTime().
There is nothing to declare on this path. The pixel is matched against the click or view cookie written when the ad was served, and post-click or post-view follows from whichever the cookie carried; a click beats a view when both are present.
The landing-page snippet
-
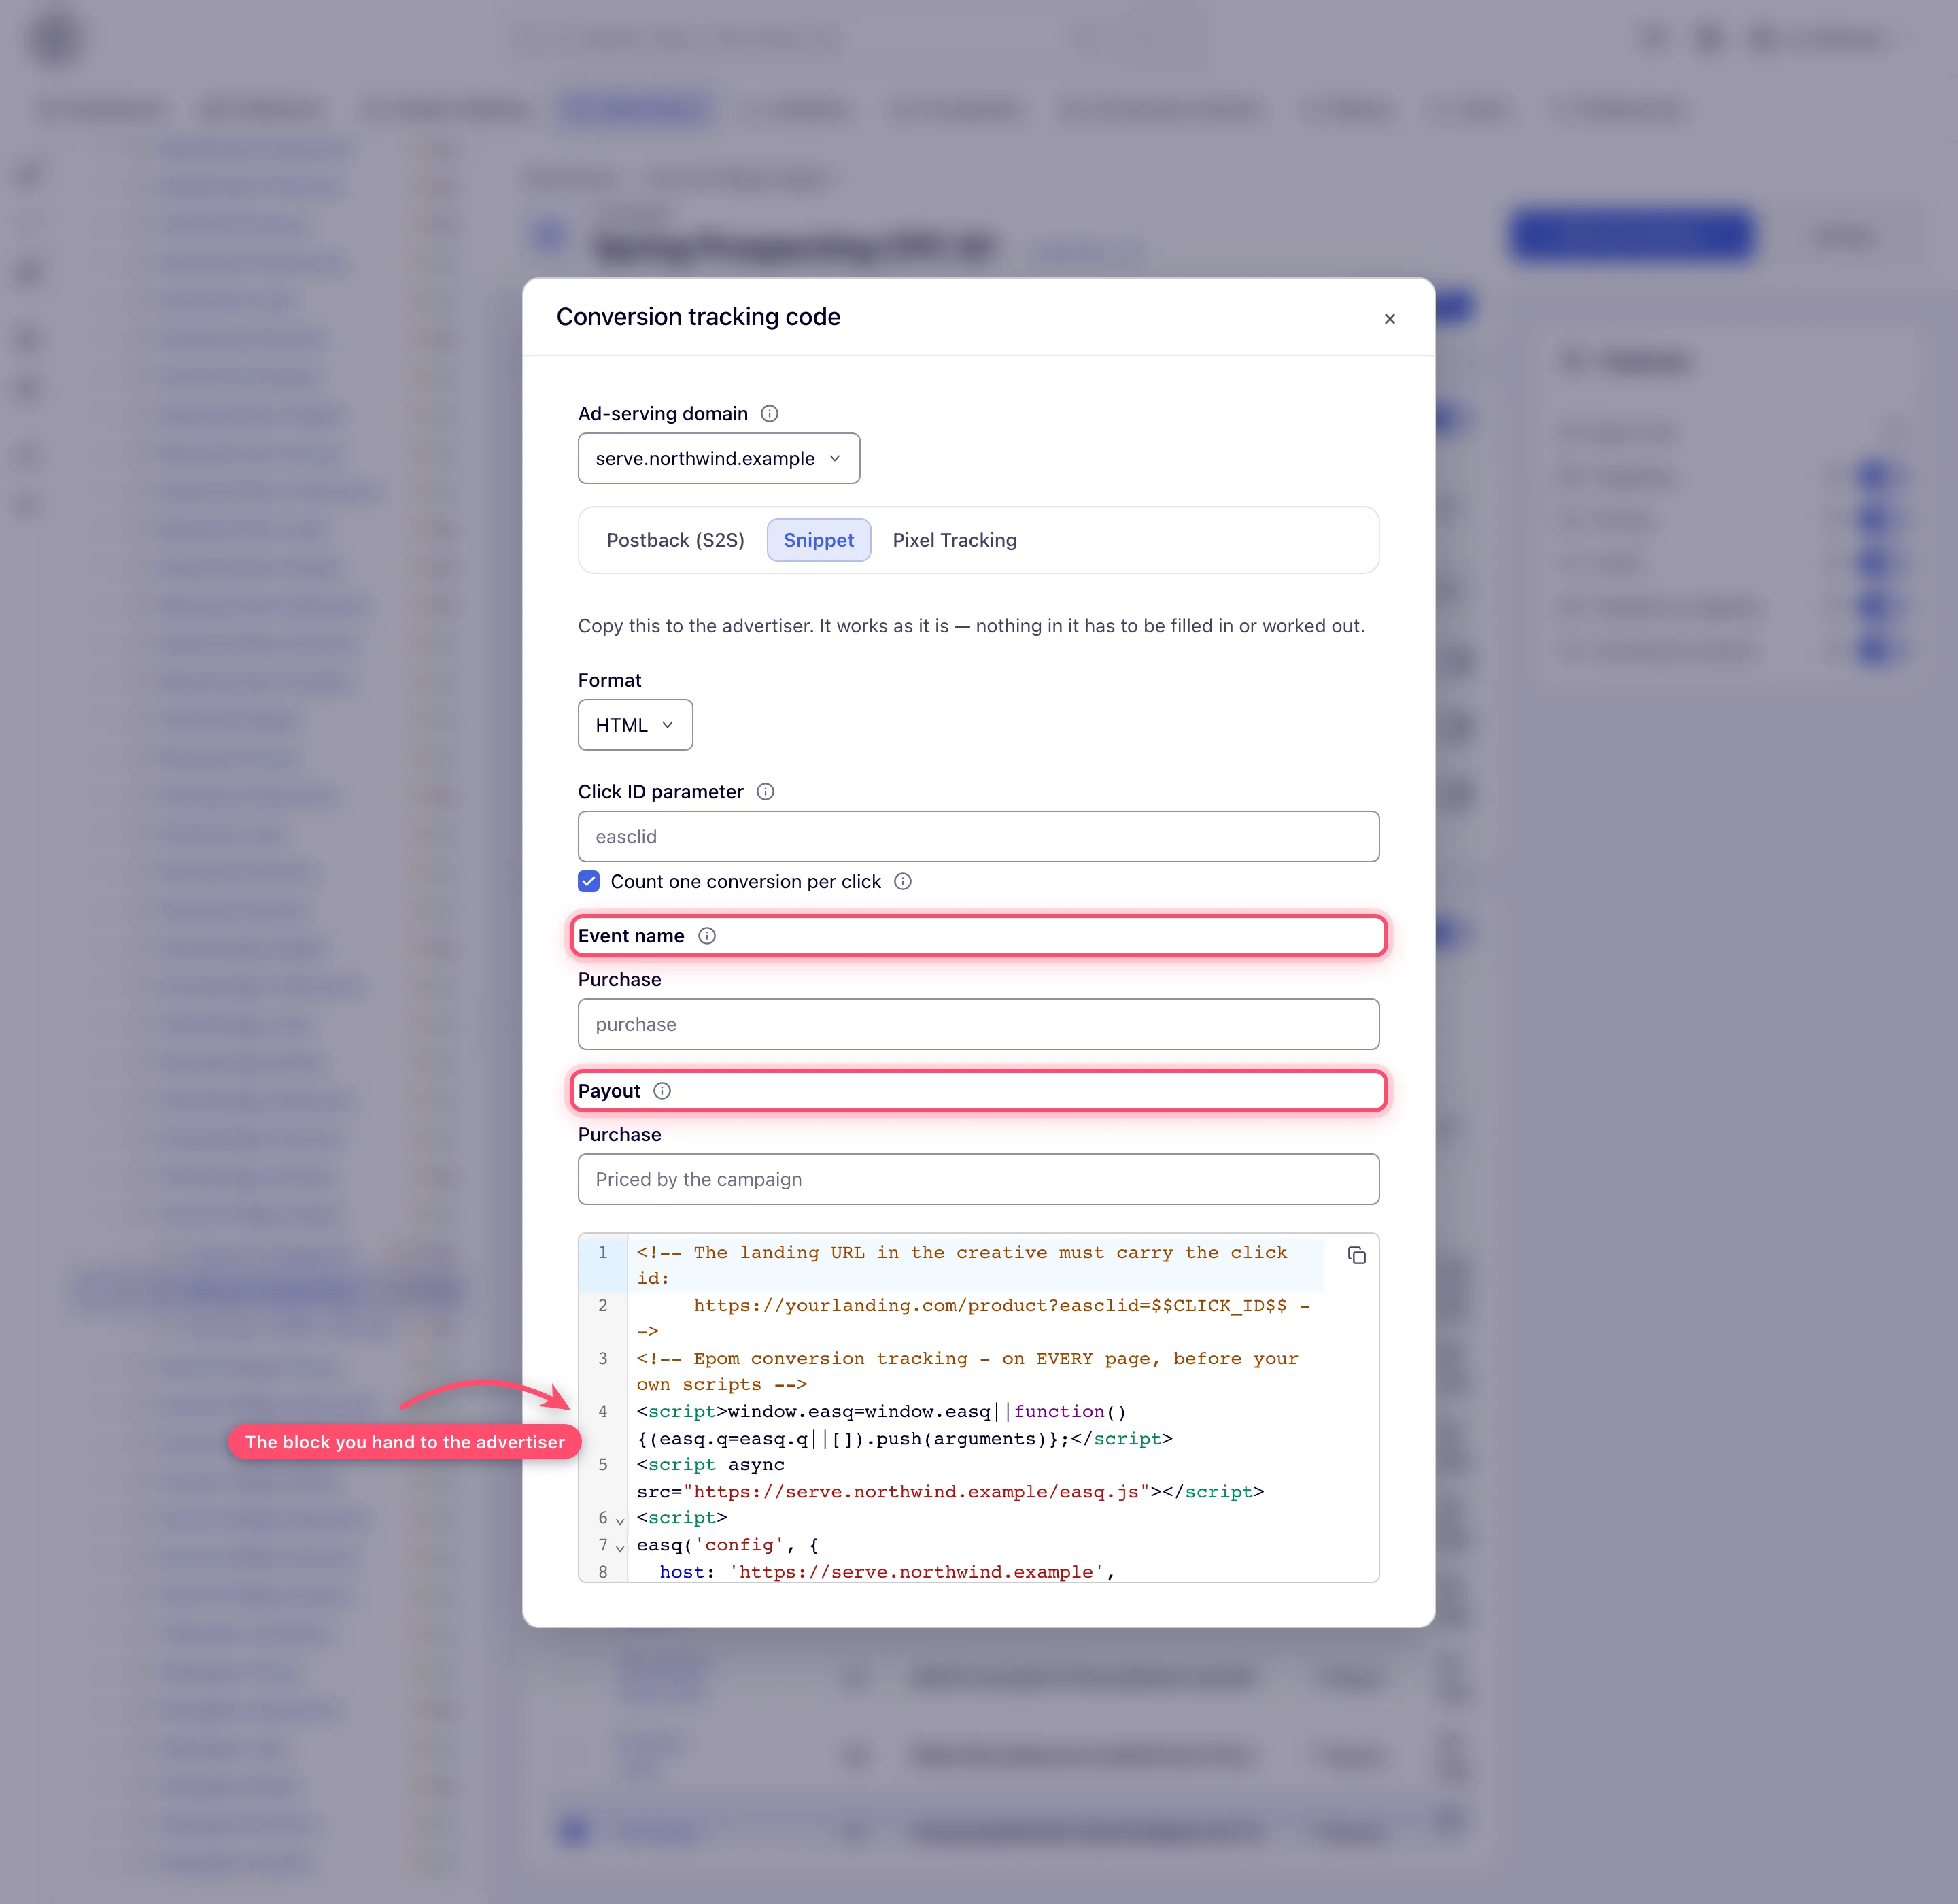
Open the Snippet tab. It builds a JavaScript block you hand to the advertiser to paste on their own site. It captures the click id out of the landing URL, keeps it in the advertiser’s own first-party storage, and posts the conversion from the page when it happens — which is why it keeps working where the pixel’s cookie does not.
-
Set the tab’s fields — Format, Click ID parameter, Count one conversion per click, Event name and Payout — described one by one in Snippet tab options.
-
Copy the block with the button in the corner of the code box (it scrolls inside itself, so only the first lines are in the picture). In the HTML format the block is complete as it comes out, with nothing in it for the integrator to fill in; the Google Tag Manager format ends with an optional one-tag-for-every-step alternative, and its
{{…}}variable names are the one thing the integrator has to point at real GTM variables. -
Install it on every page of the advertiser’s site, not only the conversion page — it is what captures the click id when the visitor arrives — with the per-step lines where each step happens. Install the landing-page helper walks through the whole block line by line, and covers how an action is counted once per click, how long the stored click id survives on each browser, why
payoutis not the value of the order, and how to ask it what went wrong.
Once the code is in place, confirm it reports: Test a conversion.
Caveats and exceptions
The pixel is window-checked, always. A cookie older than the action’s post-click /
post-view window does not produce a conversion: it is recorded as a zero-revenue expired
diagnostic (XD-reason: expired), and a window set to 0 means that event type never converts at
all (window-disabled). Server-to-server postbacks have a per-action opt-in for this; the pixel
does not need one, because it can see how old the cookie is.
Everything else the pixel can lose, it loses with the cookie. Nothing is recorded when cookies are blocked or cleared, in private browsing, or when the user converts in another browser or on another device — and the loss is silent. The window’s own warning note says the same, and names the two alternatives: the Snippet does the same job out of the advertiser’s own first-party storage, and Postback (S2S) covers conversions that never touch a browser. Use the snippet or server-to-server tracking for the first group, and widen the window for conversions that arrive too late.
The Snippet tab does not check the landing URL. It will build a block for a campaign that is
not tagging its landing URLs. The reminder travels as a comment at the top of the generated
block, naming the click-id parameter you chose: the creative’s landing URL has to arrive carrying
the click id. Turn on Add the click id to landing page URLs on the campaign’s Conversion
actions card — it reaches every creative whose click-through is built out of its own Link field,
including the email-placement click and a click-through placement’s URLs. HTML Code, Template,
native and OpenRTB creatives need $$CLICK_ID$$ put in the landing URL by hand. See
auto-tagging.
The plain Pixel tracking URL never delivers client-side piggybacks. An image has no way to run anything. The Snippet and the legacy “JS pixel tracking with piggybacks” variant both deliver them. Server-side (URL) piggybacks are unaffected either way.
The caveats that apply to every tracking code — who can do this, the domain selector, which tabs exist outside a campaign — are on Get the pixel and S2S tracking code.
Not working?
| Symptom | Check | Where |
|---|---|---|
| No “JS pixel tracking with piggybacks” block | The campaign’s Piggybacks card is off, or your role lacks Piggyback Pixel Tracking. | the campaign’s Piggybacks card |
| Pixel conversions never arrive | The pixel was loaded from a host other than the one the ads serve from, so there is no cookie to read; or the visitor’s browser blocks or cleared the cookie; or a different browser / device. | the Ad-serving domain selector vs the tag’s host; use the Snippet or a postback |
Pixel conversions dropped with window-disabled | That window is 0 on the action. | the action’s windows |
| The image pixel in an email counts once, then never again | t=(timestamp) was pasted literally; it must change on every call. | the pasted Pixel tracking URL |
Expired conversions, a missing button or tab and the other symptoms are on Get the pixel and S2S tracking code; the snippet’s own checks are on Check and troubleshoot the landing-page helper.
Reference
The three pixel blocks, the Snippet tab and the permission behind each are in the Reference on the hub; the Snippet tab’s fields are on Snippet tab options.
Related pages:
