
Tour of the interface: notifications, notes and your settings
Stage 4 of the interface tour — the notification bell and its Mark all as read, the Notes tab with unread badges, the user menu with language, theme, density and UI mode, Connect AI assistant, and the switch back to the classic UI.
Tutorial network manager publisher advertiser admin Account
Goal: know where alerts and your account manager’s notes arrive, make the interface yours (language, theme, density, trees or grids), and know how to get back to the classic UI. This is one stage of the Tour of the interface; the tour needs no data and changes nothing.
Steps
- Notifications. While you have undismissed alerts or announcements, a bell with a count (it reads 9+ past nine) appears in the top bar; its colour follows the most severe one. The popover is titled Alerts and Announcements and groups them as Critical, Warnings and Info. When more than one severity is present, filter chips (All and one per severity) appear above the list. Dismiss one with its x (hover the row), or all with the bell’s own Mark all as read — which, after you confirm Delete all notifications?, removes them. It is not the Mark all as read on the Notes tab (step 2), which only marks your account manager’s notes read and deletes nothing.
- Read your notes. If your role has the Notes tab, it shows once your account manager
has left you a note, and holds the notes they left for you, newest first, each with its date. The tab carries a badge with the number
of unread notes (on a phone, on the bottom bar), and an unread note has a dot before its first
line. The check mark by a note’s date (Mark as read; it shows when the pointer is over the
note, and always on a phone) clears one, Mark all N as read over the list clears them all;
opening the tab does not. A note your account manager changes is unread again. Before the
first note the tab is not in the strip, but its address (
/v2/account/notes) still opens on the permission alone, with an empty list.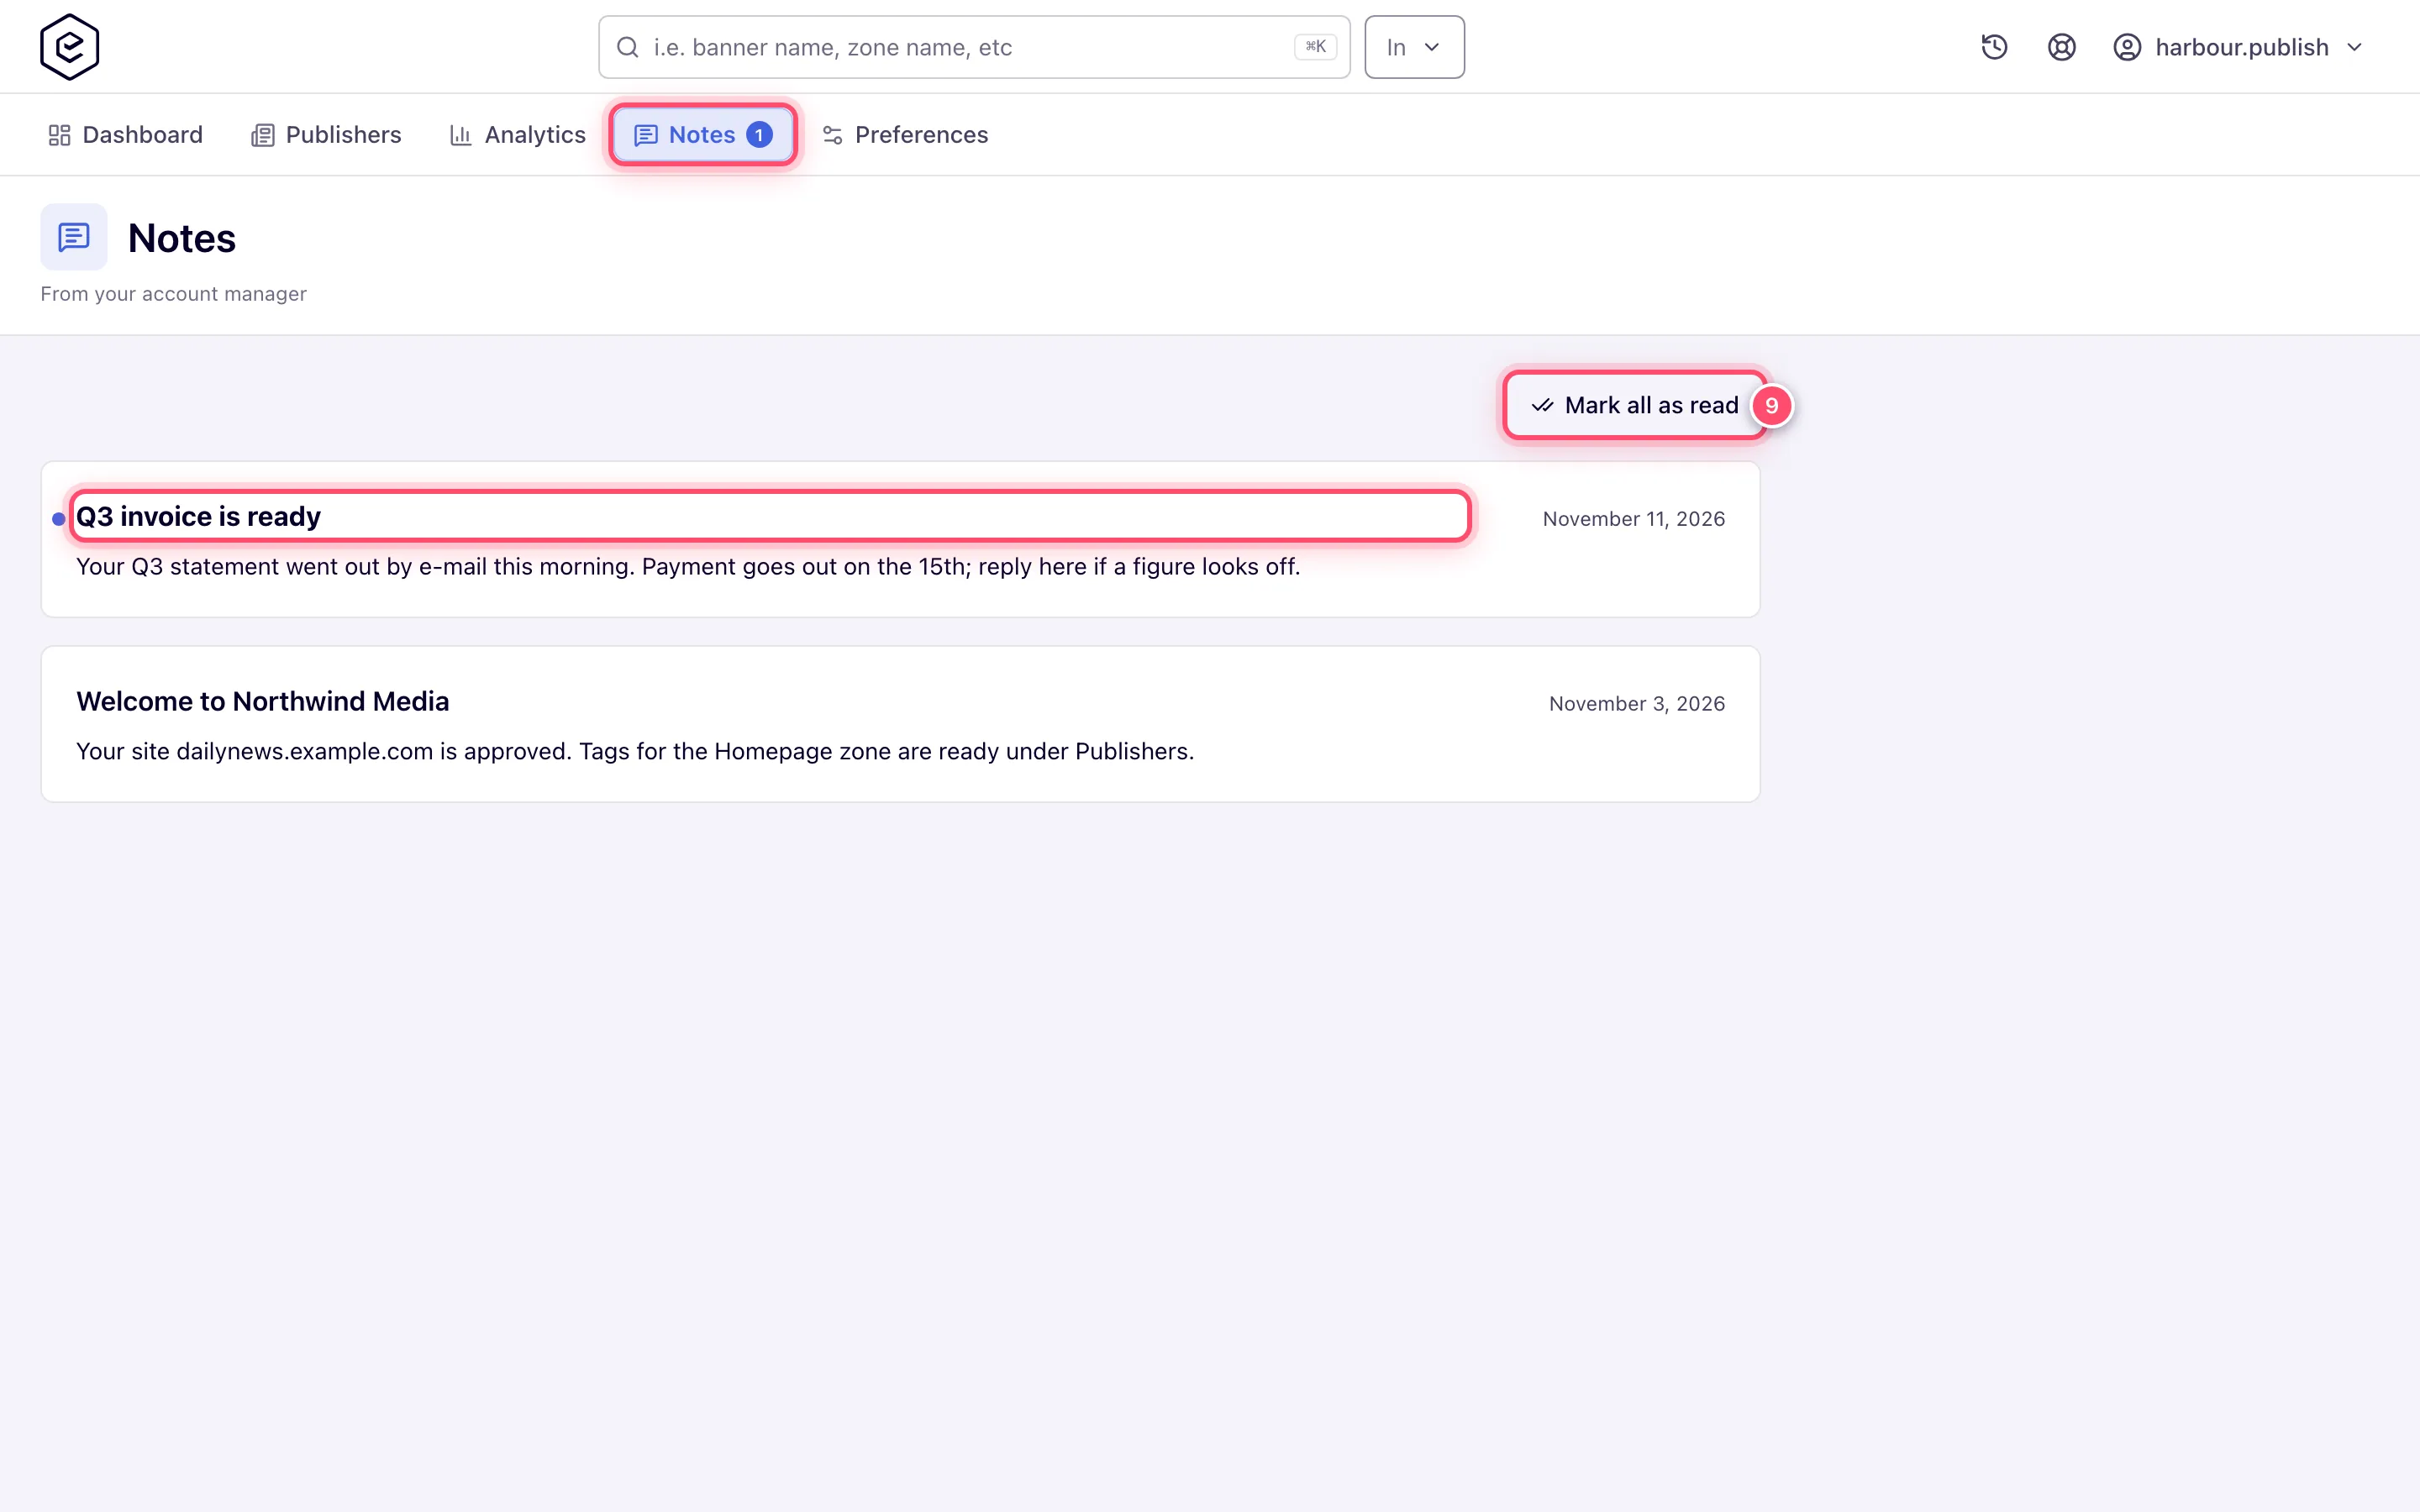
- Make it yours. Open the user menu (your username, top-right). From the top it holds:
- your username and role name;
- Display language — switches the whole UI language (page reloads);
- Color theme — Light/Dark, applies instantly;
- Density — Cozy/Compact row spacing, applies instantly;
- User interface mode — Trees vs. Grids for the entity sections (page reloads);
- Open classic UI — see the next step;
- Connect AI assistant — opens the AI assistant (MCP) card in Preferences, where you connect Claude Code, Cursor or another MCP client to your account;
- Log out (or Exit user).
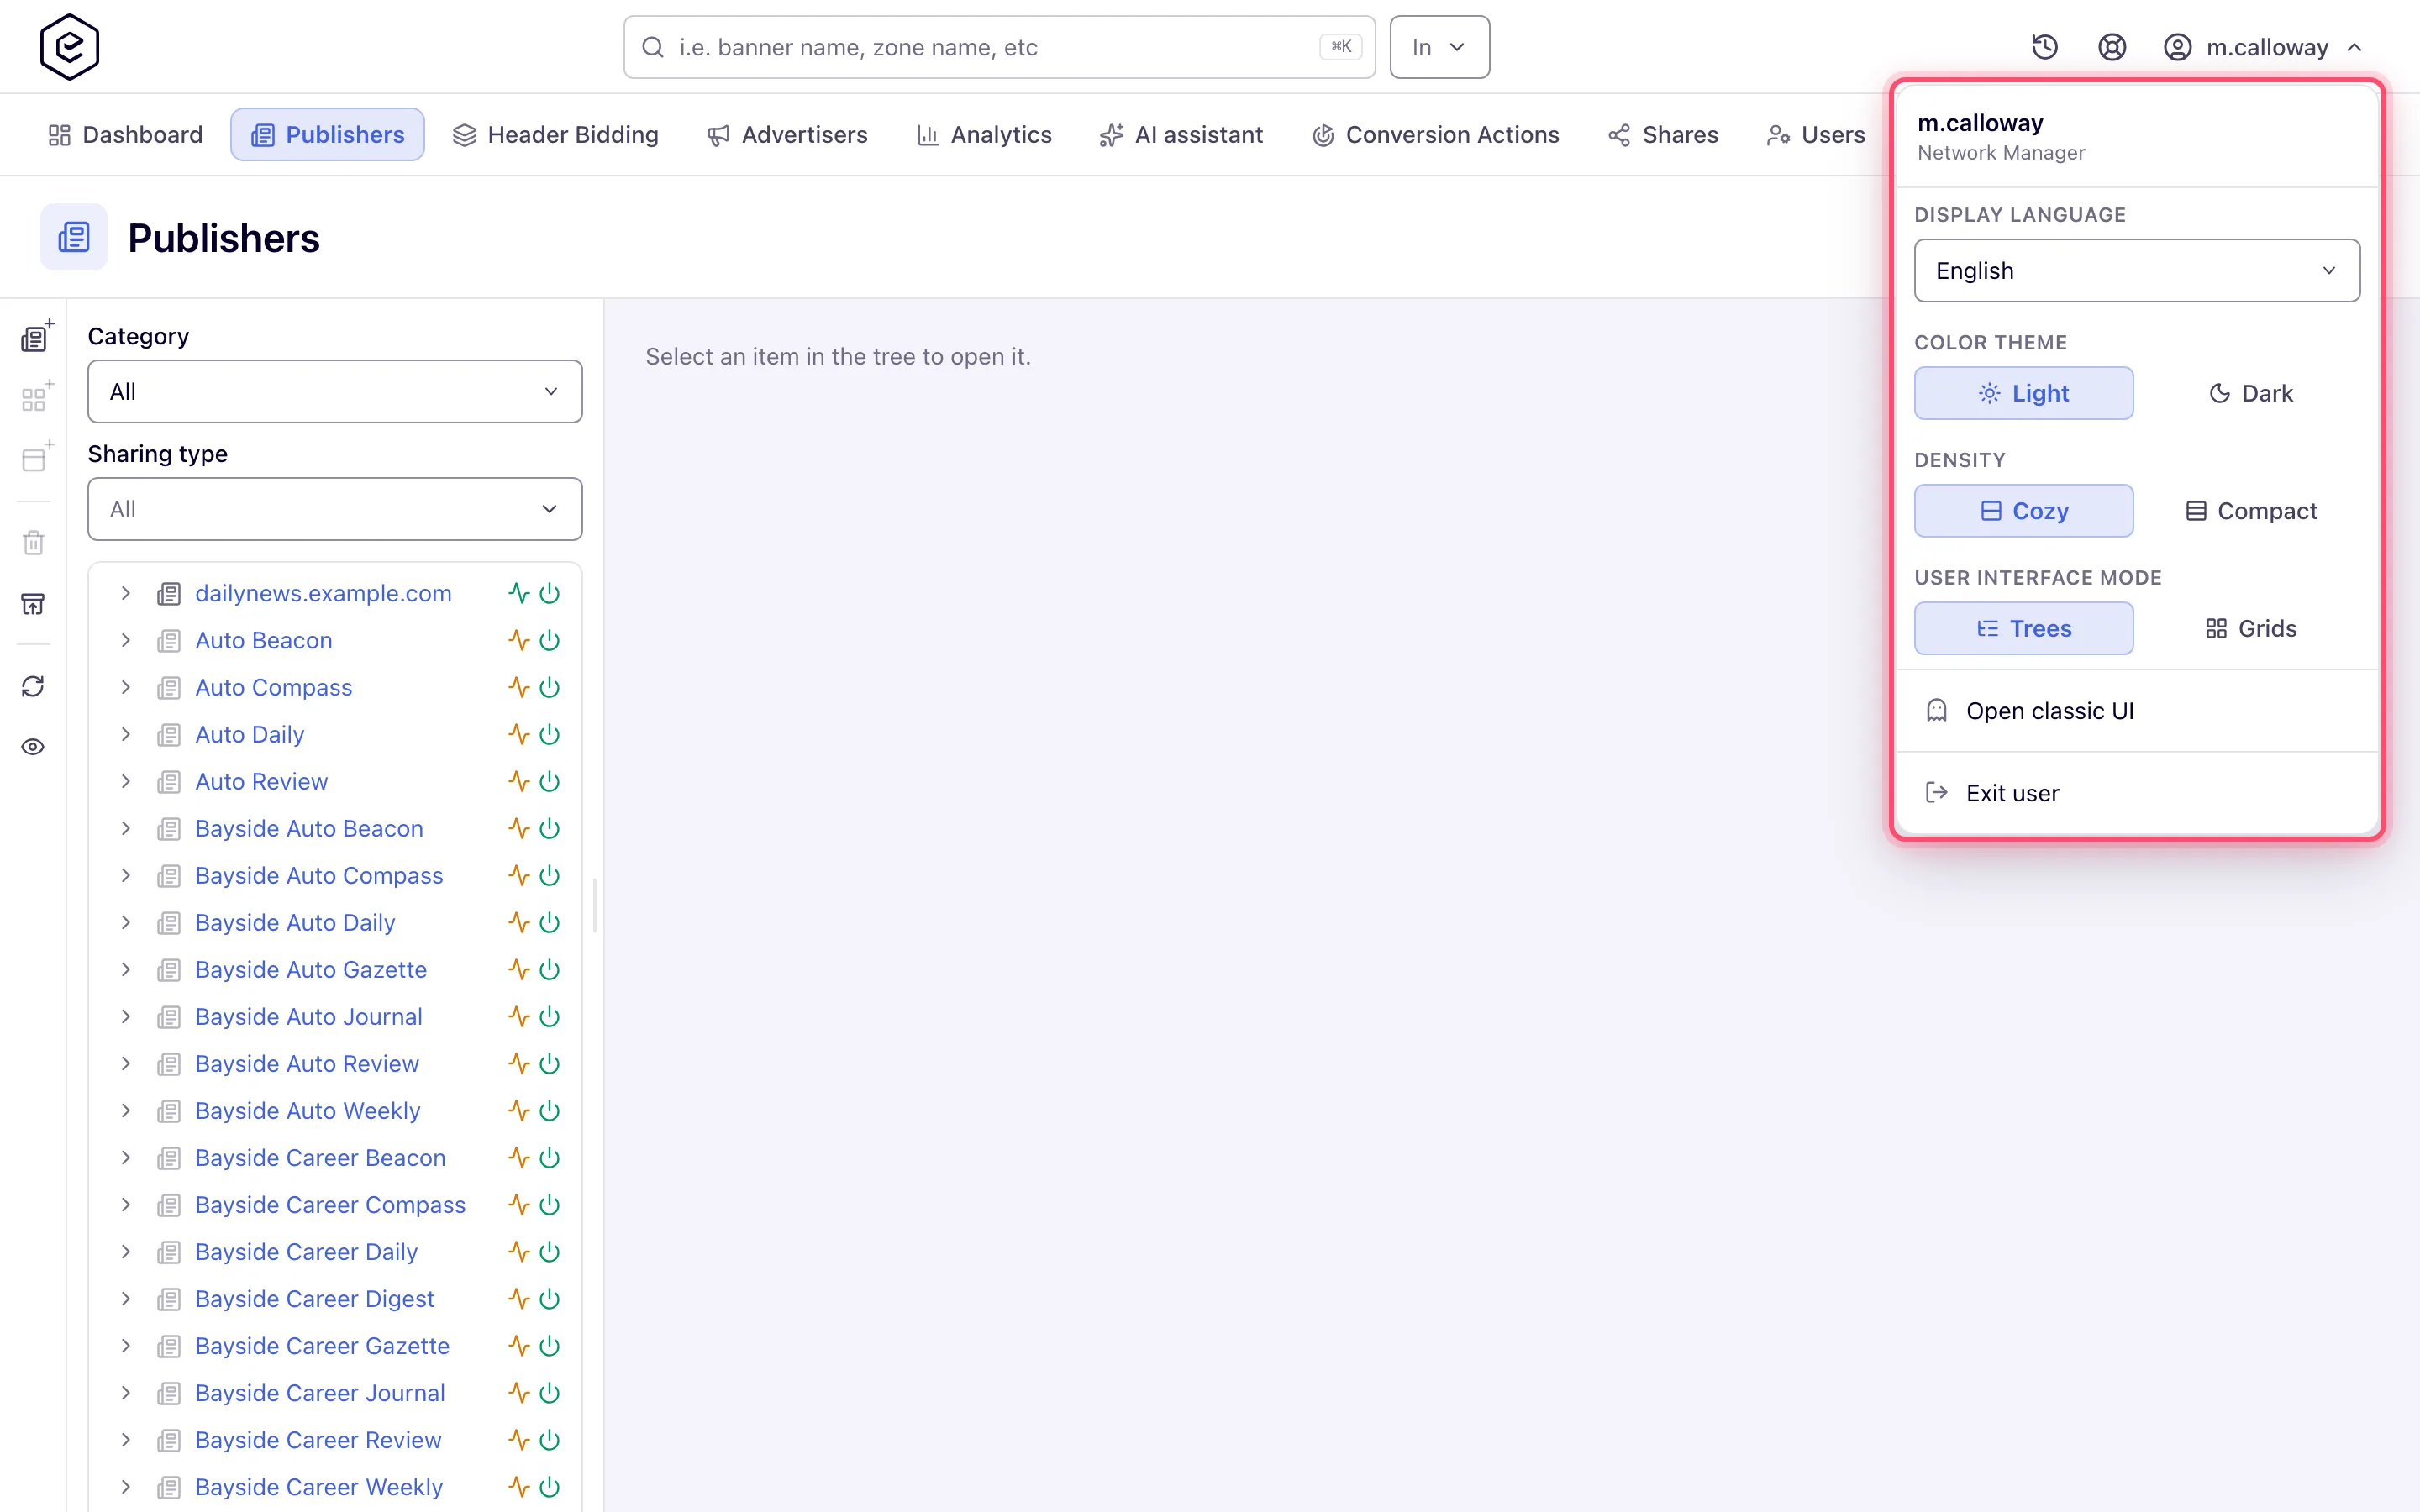
- Switch back to the classic UI. If your network allows it, the user menu shows Open classic UI — it takes you to the previous-generation interface, and the choice is remembered in your browser until you use Switch to new UI in the classic header. Both UIs work on the same data, so switching loses no entity or report — but a few newer controls exist only here (see the gotchas).
What next
- Tour of the interface — which tabs you get, the options and the gotchas
- Network quick start — build the first chain and serve an ad
- Preferences — your profile and display settings
