
Quick start for network managers: create the demand side
Stage 1 of the network quick start — create the advertiser, the campaign and a Local File banner for a site placement, with the fields each save needs and what success looks like.
Tutorial network manager Account → Advertisers / Publishers
Goal: in about ten minutes, have one chain on the demand side — Bluebird Outdoor → a campaign → a 300×250 banner — saved and ready to be linked to a placement. It is one stage of the network quick start, whose prerequisites, caveats and fix-it table apply here too.
Steps
Stage 1 — create the demand side (advertiser → campaign → banner)
- Go to Account → Advertisers. In tree mode, use the action rail next to the tree and click New advertiser (in grid mode the New advertiser… button sits above the grid).
- On the Create new advertiser page fill in Name (the only required field) and leave
the status toggle on Active.
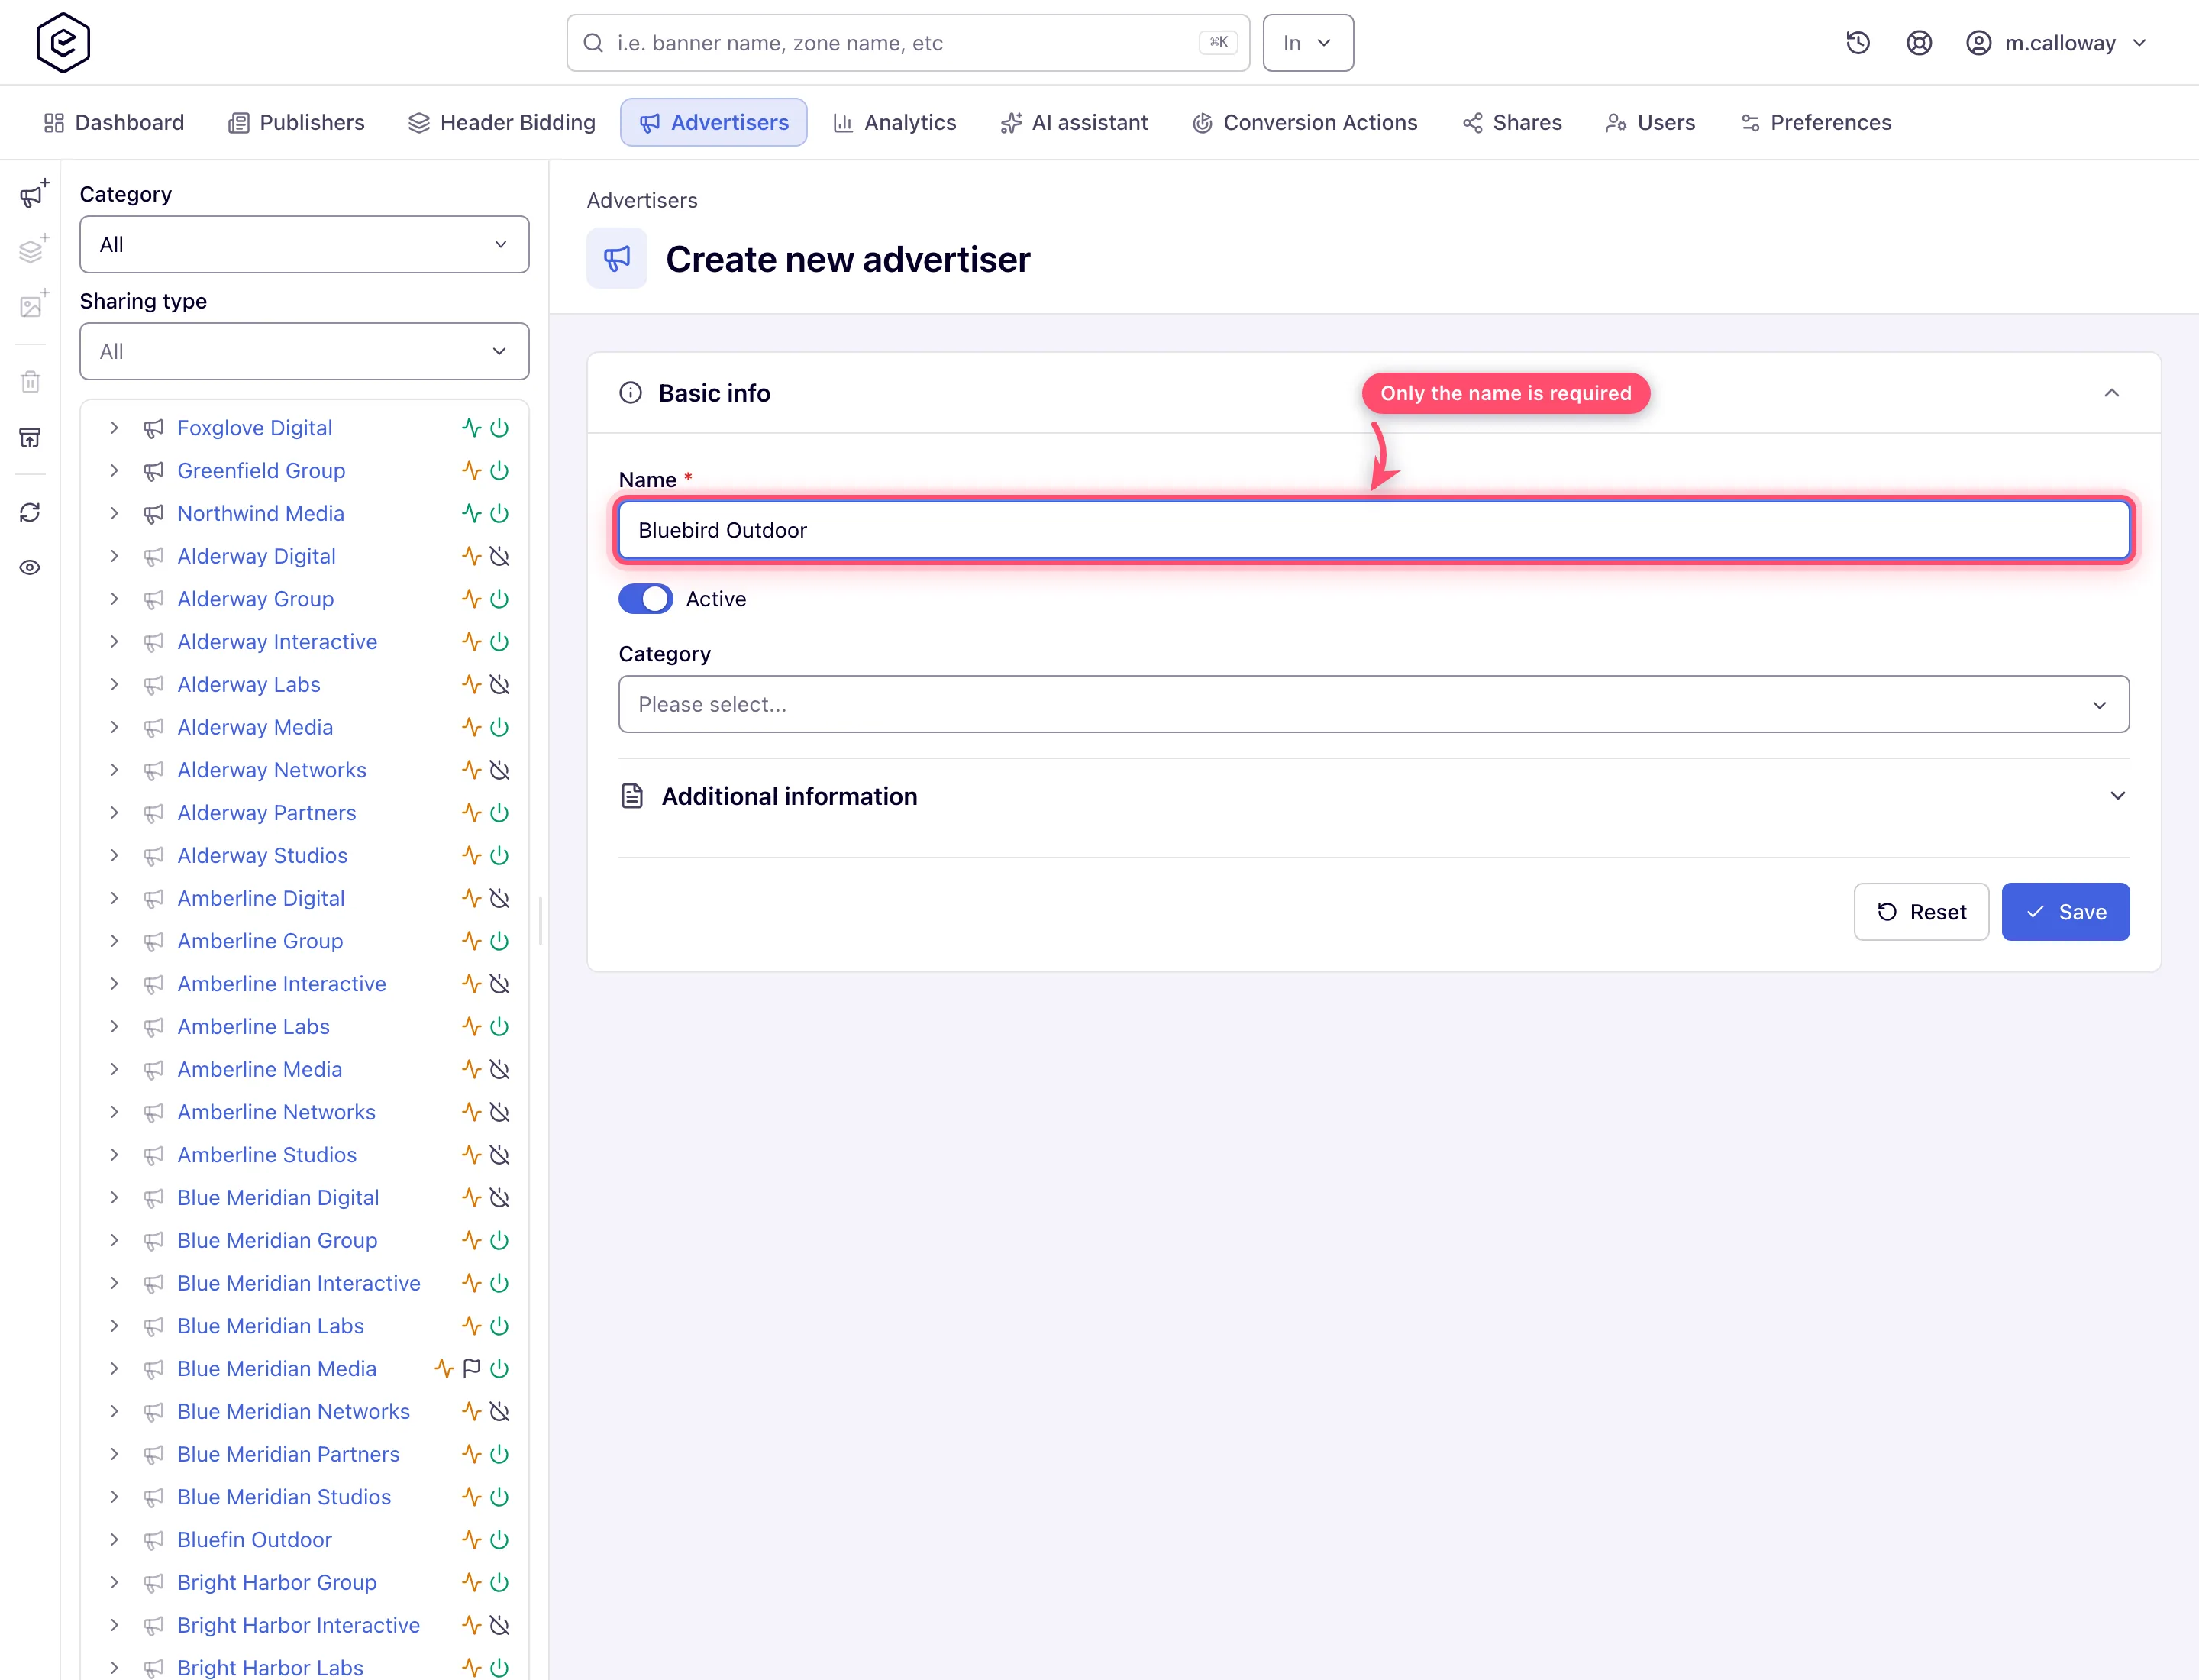
- Click Save. Success: you land on the advertiser’s full edit page — the Basic info card is now joined by Targeting, Limits, Frequency capping, Sharing settings and the advertiser’s other cards.
- Click New campaign (on the action rail, or Add new campaign in the advertiser’s header). Fill in Name, keep the status Active, and leave Weight — and Priority, which shows only with the Manage Priority permission — at its default for now. Click Save. Success: a “Campaign saved” toast, and you land on the campaign edit page.
- With the campaign selected, click Add new banner for… on the action rail (or Add new banner in the campaign’s header). The menu holds one Add banner for … entry per placement type you may create banners for. Pick Add banner for Site Placement (standard display).
- On the new-banner form fill in Name and pick the Banner type. For the simplest first
run use Local File and upload your image under Banner creative (Upload file; From
link takes a URL instead). Set Ad unit to match your creative (pick the matching ad unit,
e.g. 300×250, or choose a custom unit and enter Width and Height), and enter the
destination URL the click should open.
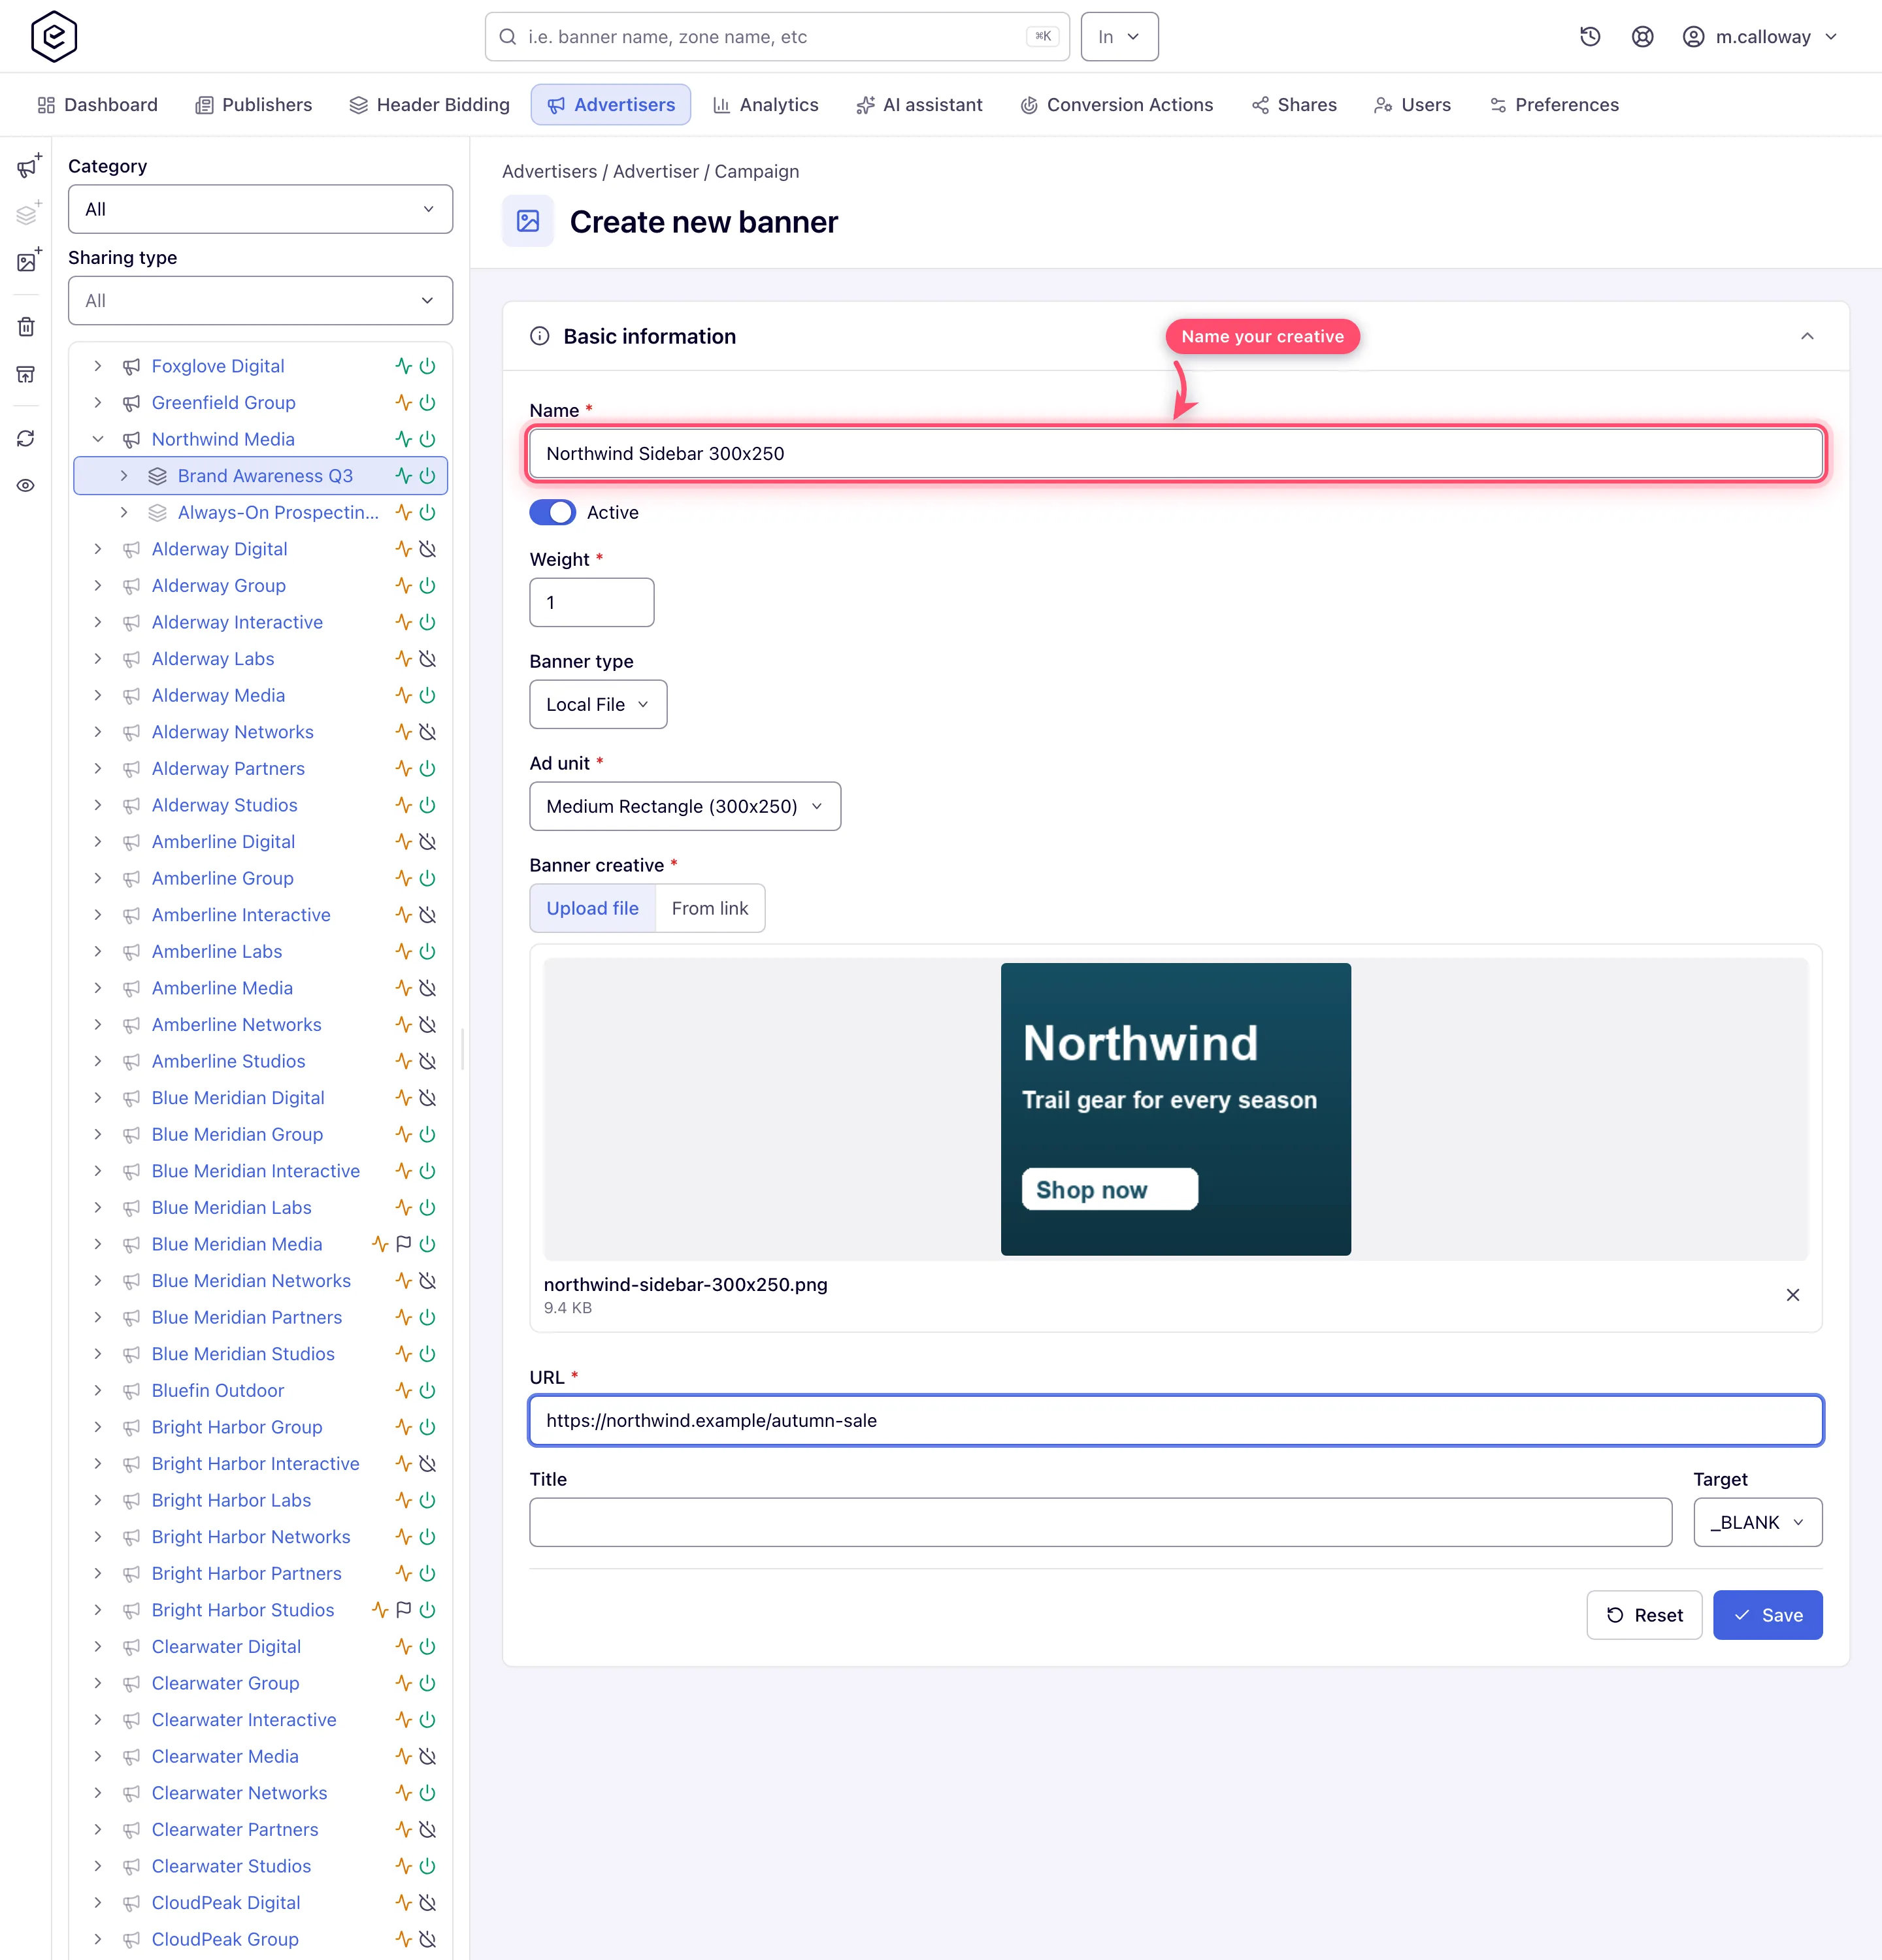
- Click Save. Success: a “Banner saved” toast, and you land on the new banner’s edit page. The creation save never asks you to link anything; you link manually in Stage 3.
What next
- Quick start for network managers: create the supply side — Stage 2
- Quick start: serve your first ad as a network manager — the whole path, its caveats and fix-it table
