
Quick start for network managers: link the banner, copy the tag and see the ad
Stages 3 and 4 of the network quick start — link the banner to the placement from the Linked placements card, verify the match from both ends, copy the Universal JS tag from Ad tags & API, preview the ad and paste the tag into a test page.
Goal: in about ten minutes, link the banner from Stage 1 to the placement from Stage 2, see the pair confirmed from both ends, and watch your image render — in the preview and on a test page with the real tag. It is one stage of the network quick start, whose prerequisites, caveats and fix-it table apply here too.
Steps
Stage 3 — link the banner to the placement
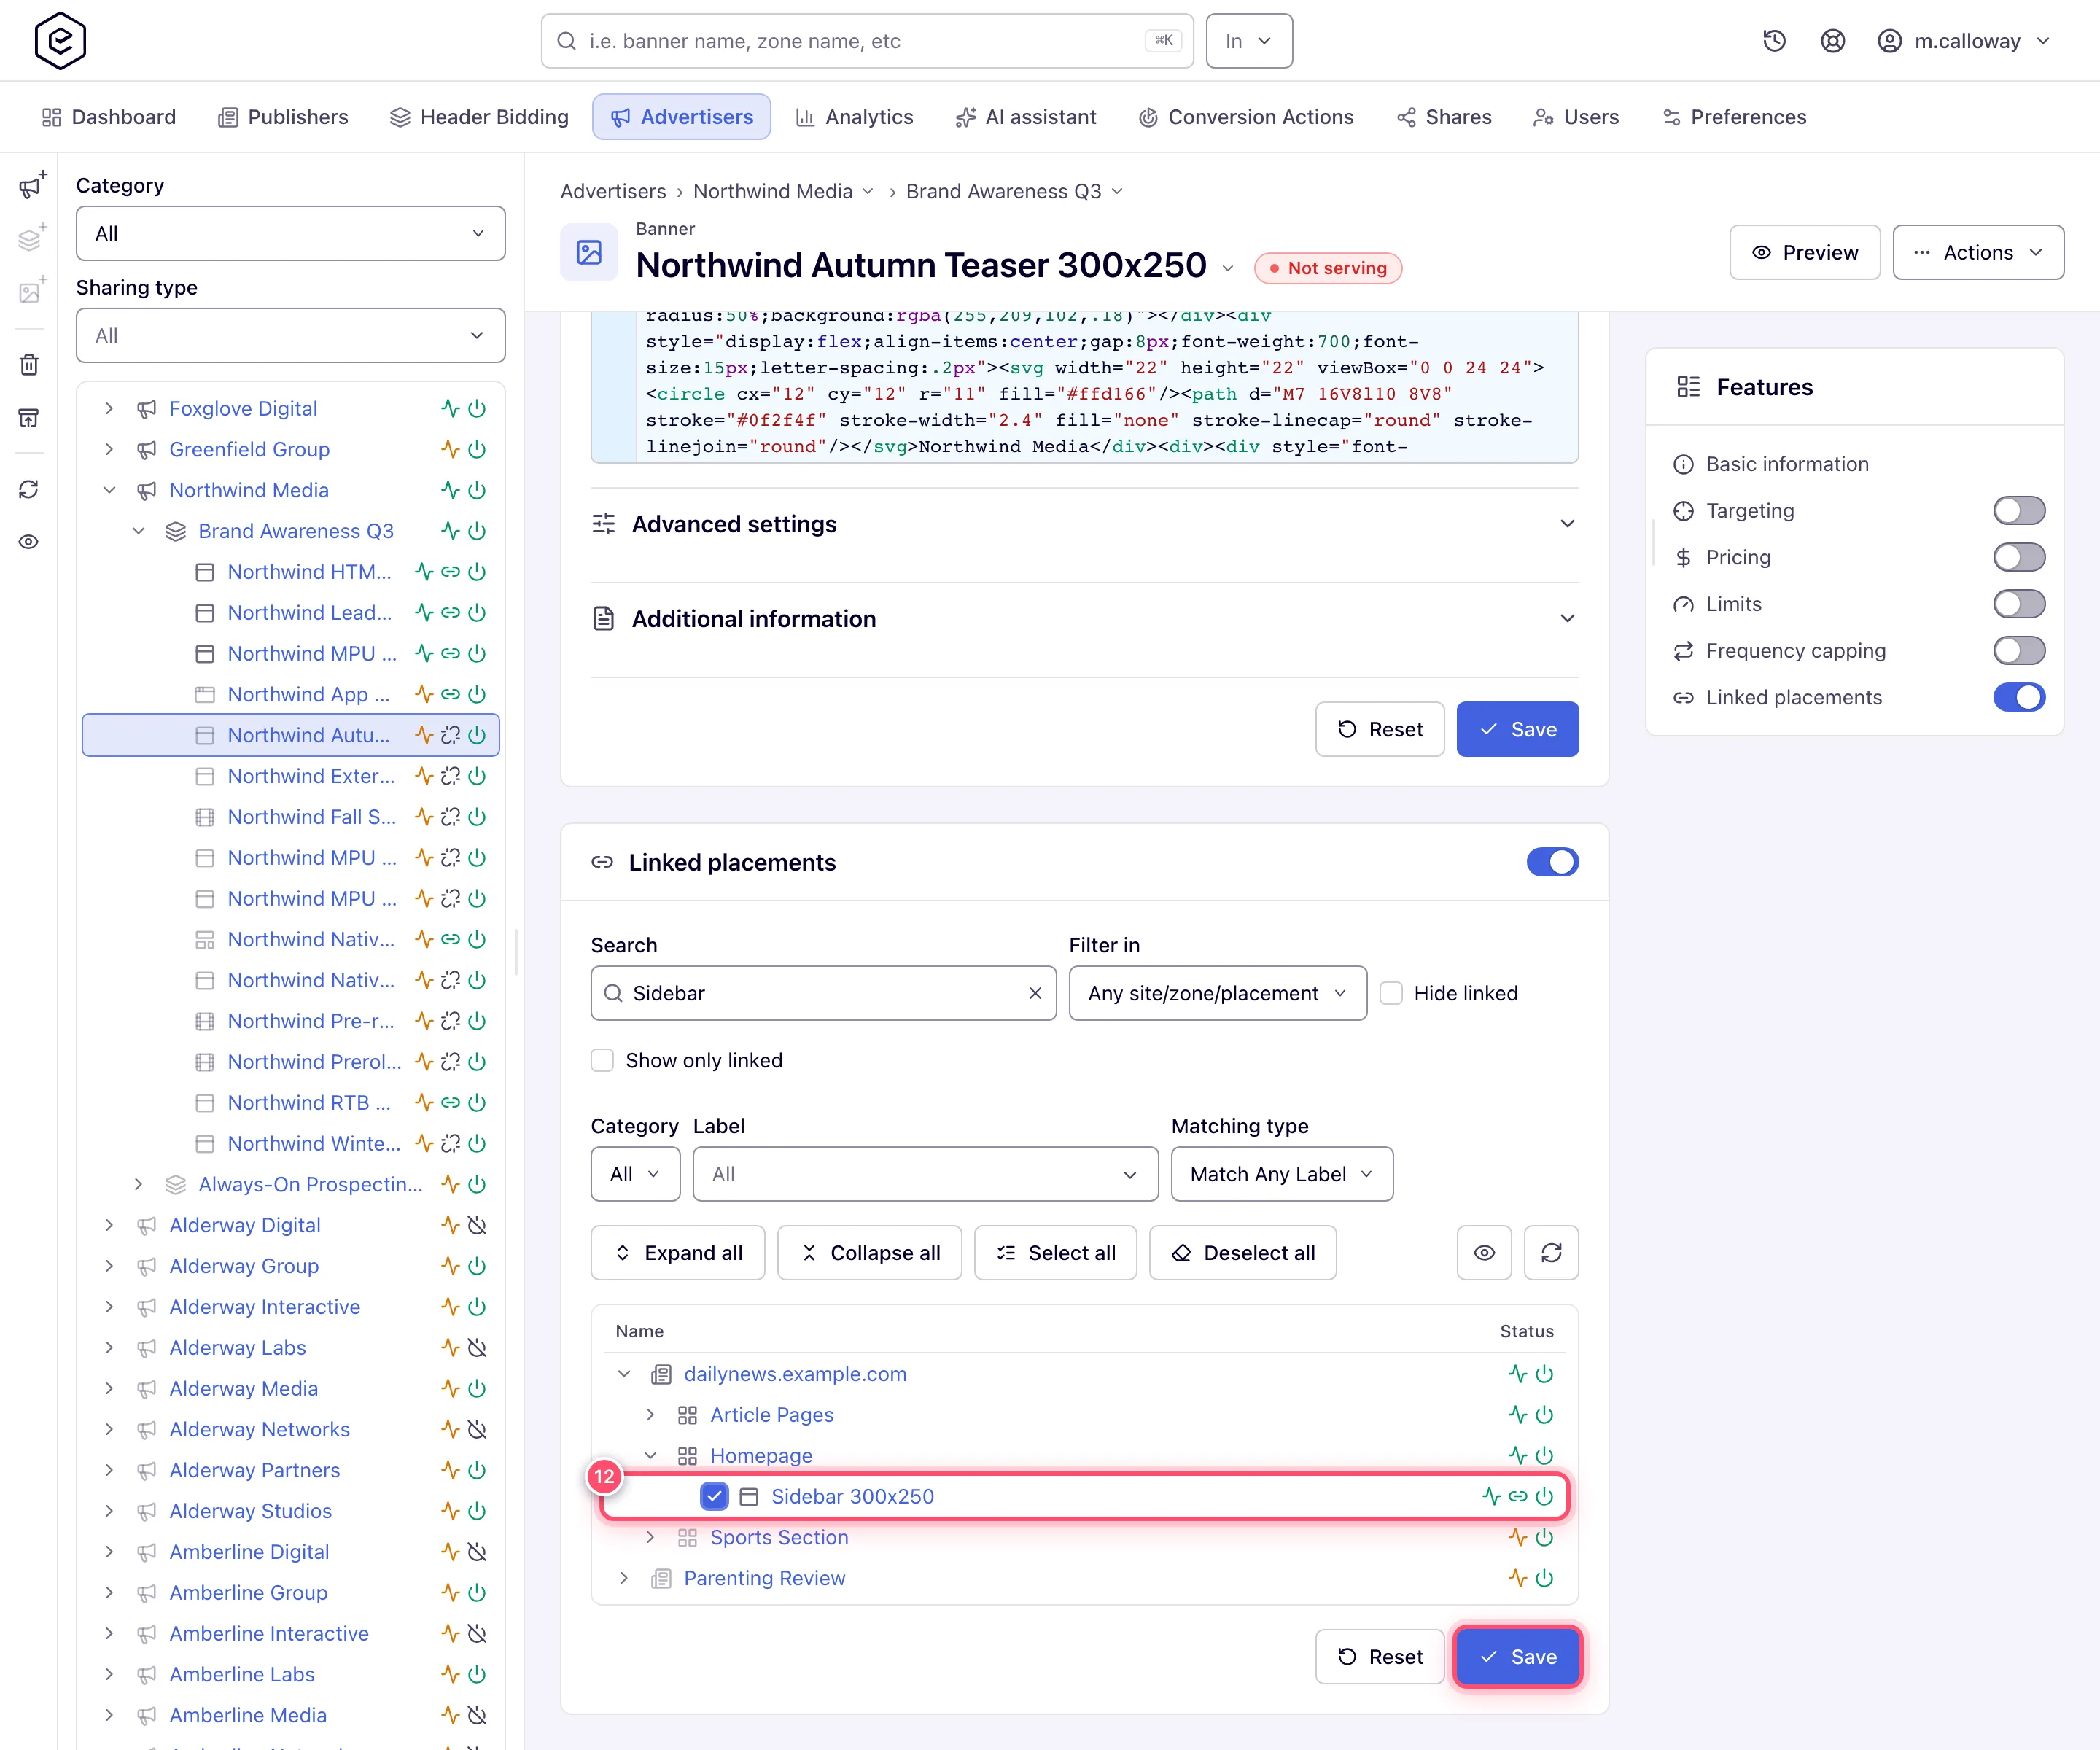
- Open your banner (Advertisers → advertiser → campaign → banner) and find the
Linked placements card. In tree mode (the default) it is a tree of sites, zones and
placements: expand the site and zone, tick the placement you just created and click
Save — a “Banner placements saved” toast confirms it. When some ticked placements could
not be linked (deleted, not permitted, or not suitable for the banner), a second message says
how many. In grid mode the card has Site, Zone and Placement pickers instead:
choose them in turn and click Link; the placement row appears in the card’s grid. On a
network whose inventory is too large for the tree to load quickly (more than 10,000 sites,
zones and placements in it), the card shows the grid form even in tree mode, with a note
saying so; Show as tree anyway brings the tree back for that page.
- Verify the match from both ends: the banner’s Matched placements card now lists the placement, and the placement’s Matched banners card lists the banner. If either list is empty, the pair is not actually servable — see the caveats below. (The placement-side card needs Matched advertisers plus the placement’s Matching rules card — the stock Network Manager has both; the banner-side card needs Matched inventory, which no stock role holds.)
Stage 4 — copy the ad tag and see the ad
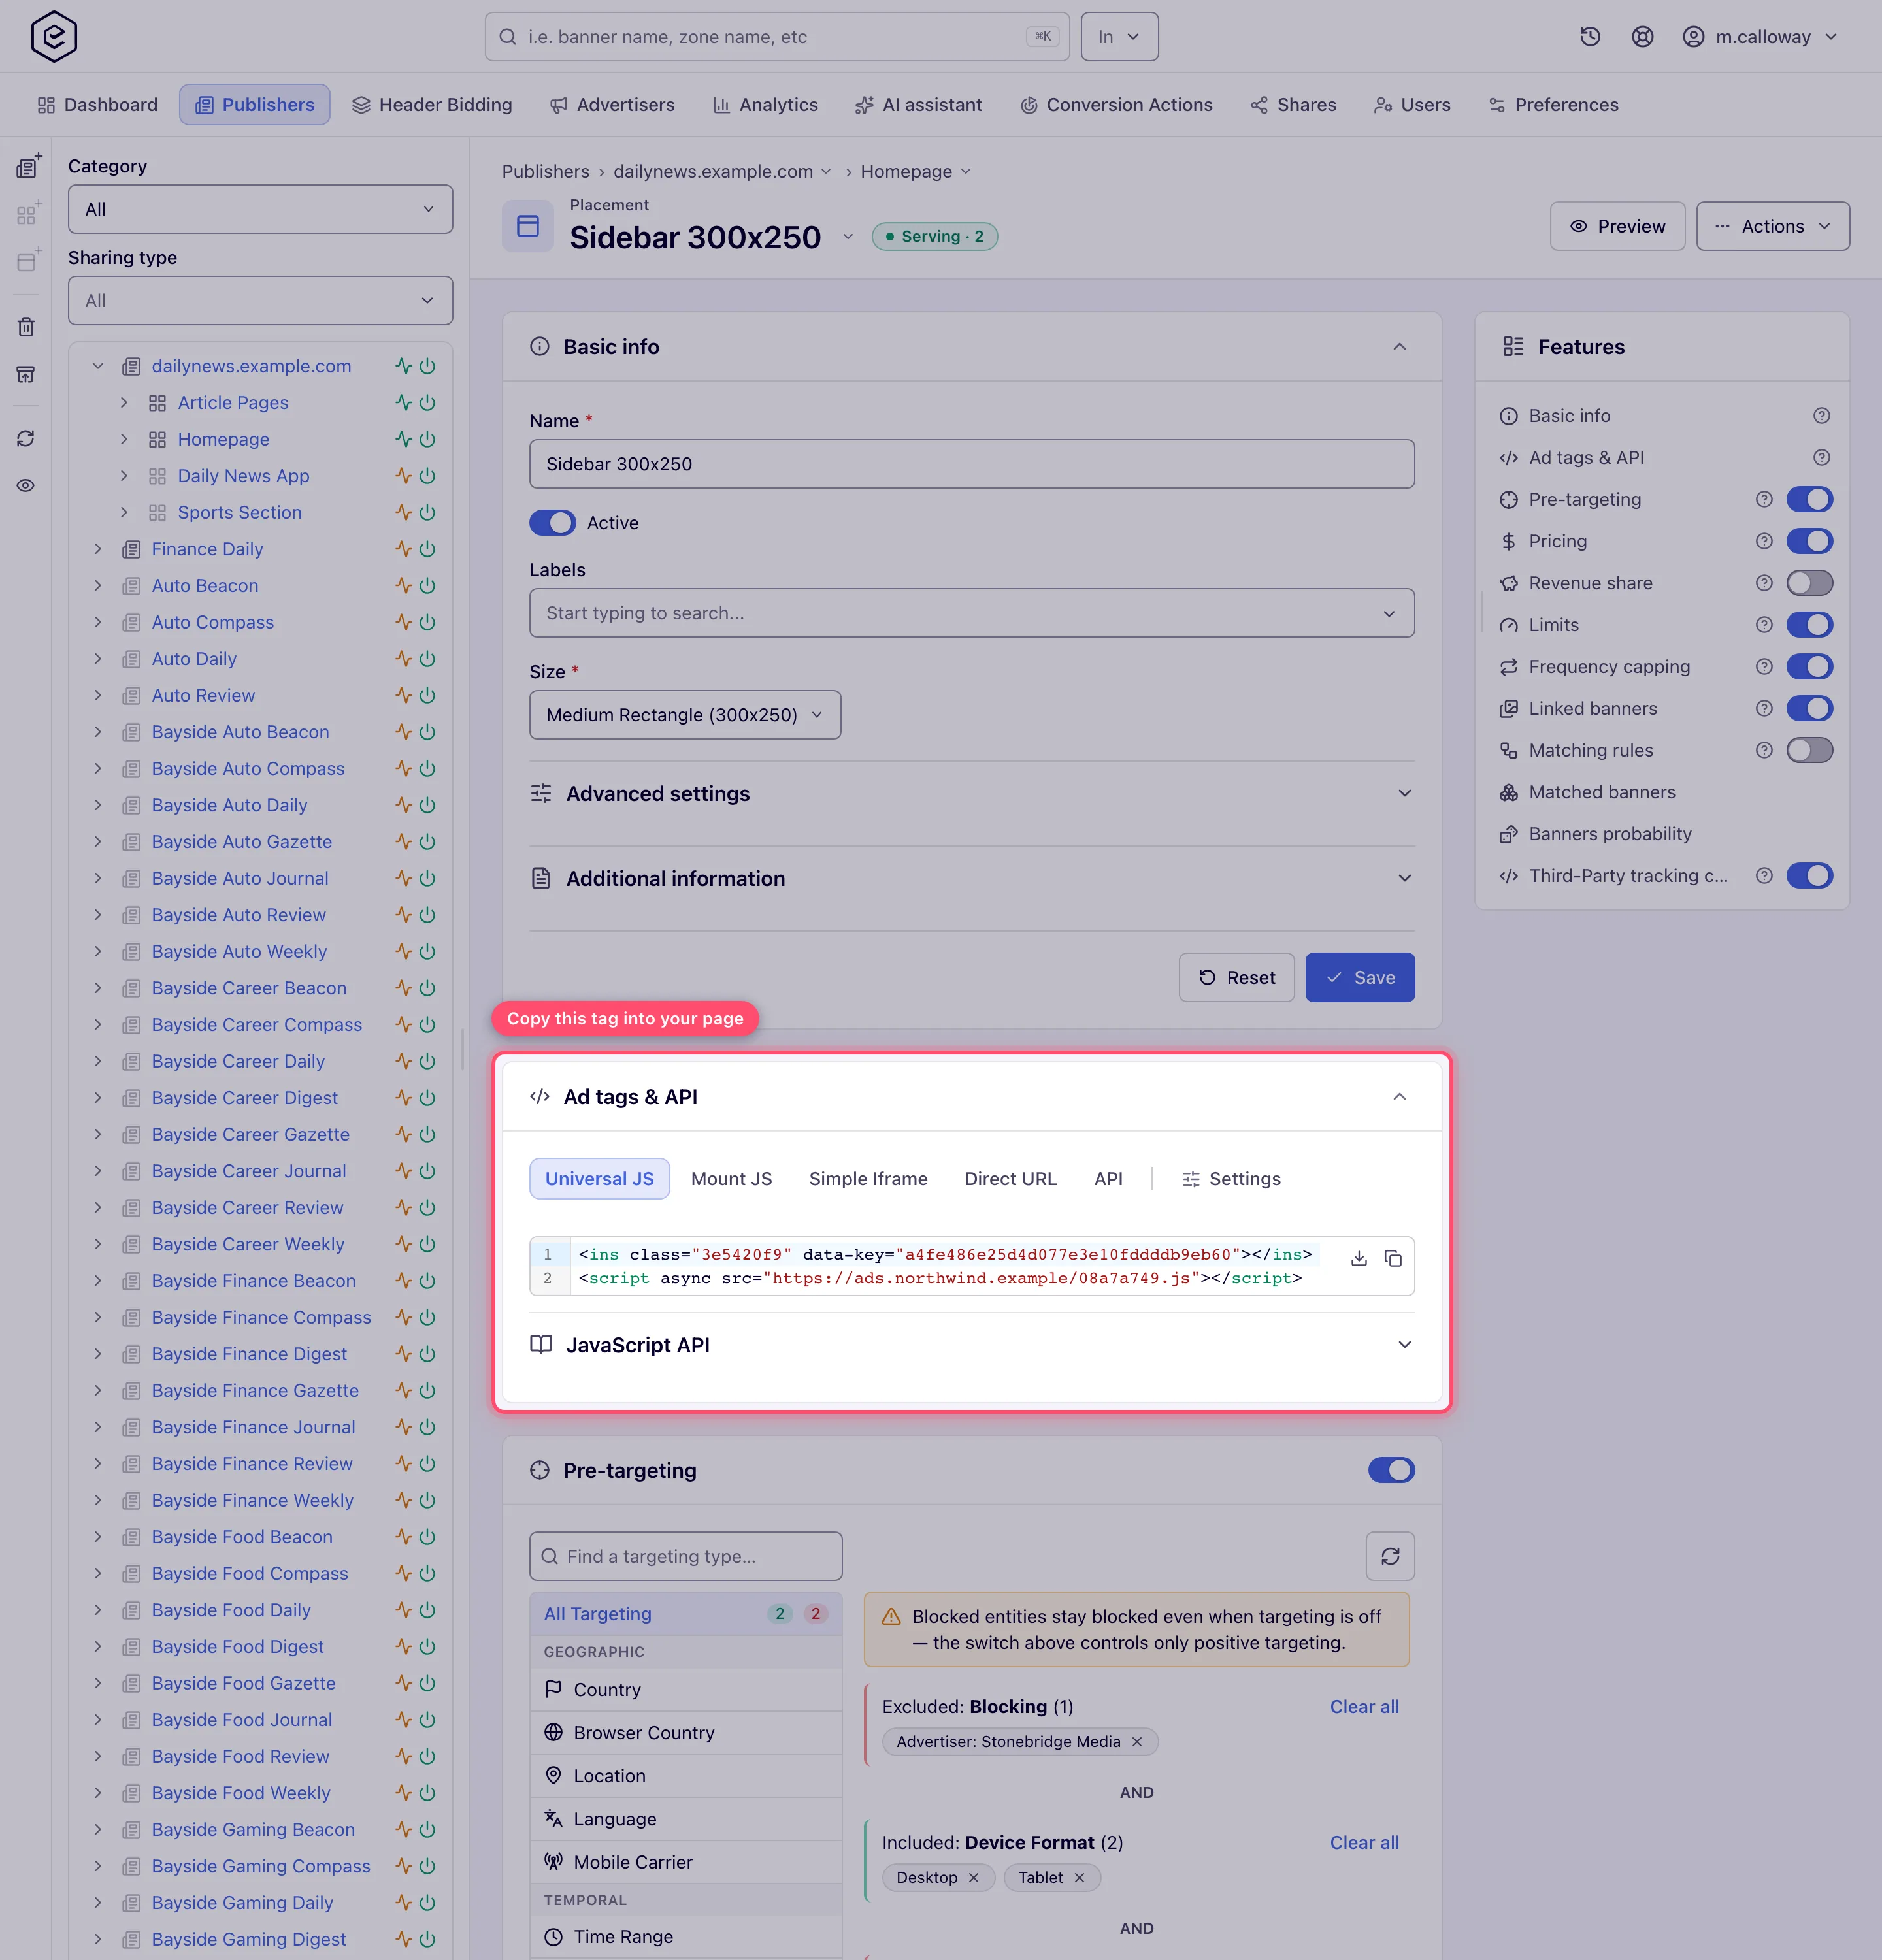
- Open the placement and expand the Ad tags & API card (it is on a saved, Active
placement and disappears while the status switch is off). It opens on the placement’s
default code type — Universal JS for a site placement, where your role holds it. The
other tabs are the remaining code types your role may use for this placement type (Mount
JS, Simple Iframe, Direct URL, API) plus Settings. Where Domain, Ad wrapper, Protocol
and Fit container controls are offered above the code, adjust them if you serve from a
custom domain or an HTTPS-only page, then copy the code block.
Note: a Copy ad tag quick action copies a placement’s tag without opening the edit page. The Grids view has it on every taggable placement row; the Publishers tree shows it only on placements with recent traffic, so a placement you have just created has none there. It copies the first tag type your role may use in a fixed order — Simple Iframe and Direct URL come before Universal JS — so copy from the card when you need a particular one.
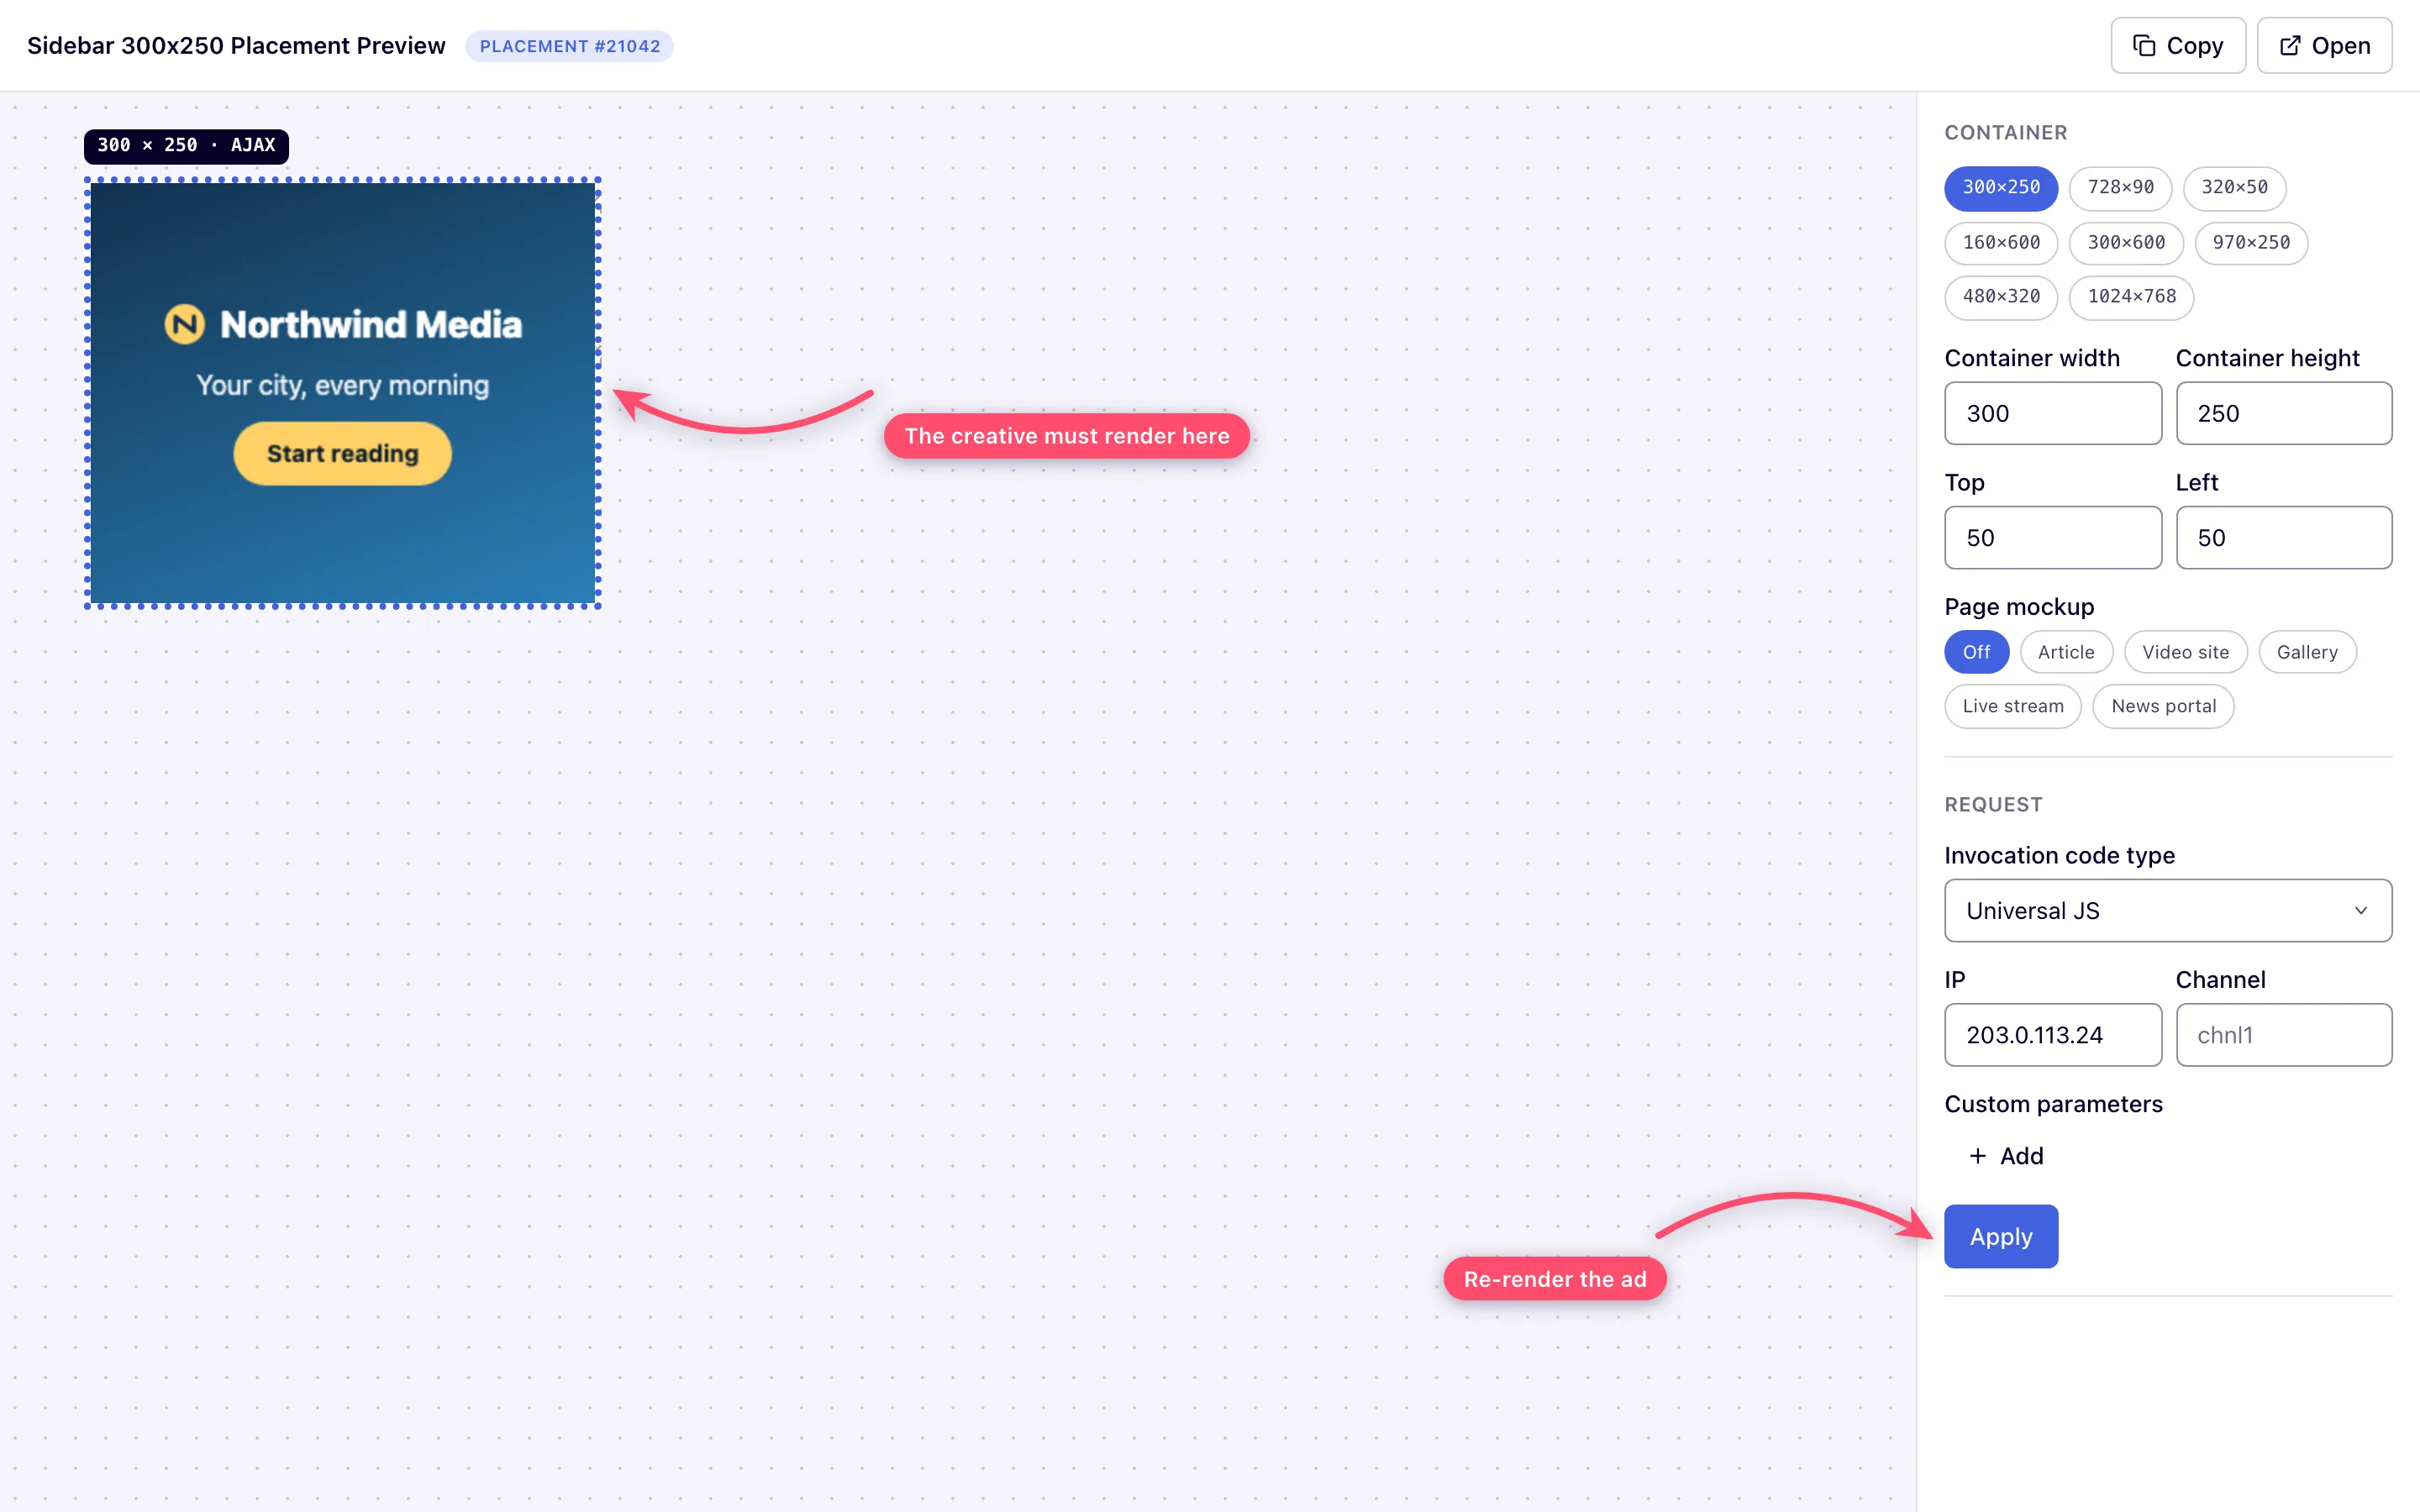
- Check the ad before touching a real page: use the Preview action on the placement. It
opens the standalone preview page, which renders the ad in an ad container on the page and
lets you tweak layout (container size, top and left offsets, page mockup) live, and request
parameters (invocation code type, IP, channel, custom parameters) with Apply, which
refetches the ad. Success: your test image renders.
- Paste the tag into a plain HTML file, open it in a browser, and confirm the image renders there too. Reload a few times to generate a handful of impressions, and click the ad once to record a click.
Caveats and exceptions
An unlinked banner serves nothing. Creating a banner and a matching placement is not enough — the link is an explicit step (Stage 3). If the placement shows an empty Matched banners list, no ad can come out of it, and the page shows the passback code or nothing at all.
Size mismatch blocks linking. The link is refused for a “not suitable” placement — most commonly the banner size does not match the placement’s ad-unit size. Fix the size on either side and link again.
The “link to all matching placements” dialog is not on creation. A Confirm dialog that offers to link the banner to all matching placements appears only when you save an existing banner and the server finds matching placements, never when the banner is first created. If you answer Do not link, the banner stays unlinked and there is no reminder later — you have to link it from the Linked placements card.
Saving a placement can unlink. Saving an existing placement unlinks banners that no longer fit it — after a size change, for example — and says only “Done”. Re-check the link list after editing a placement that is already in service.
The caveats that apply to the whole quick start — targeting, moderation, report freshness and permissions — are on Quick start: serve your first ad as a network manager.
What next
- Quick start for network managers: check analytics — Stage 5
- Quick start: serve your first ad as a network manager — the whole path and its fix-it table
- Hierarchy and linking — why the link is a separate step
